5 Benefits of LibreOffice Writer

Libre Office is a word processing program which comes installed automatically with Linux Mint – and can also be installed separately on any Windows or Apple computer. In this chapter, we will review several reasons why Libre Office Writer is better than MS Word. Chapter 5, Benefits of Libre Writer, includes the following four sections:

5.1 Why Libre Writer is better than Microsoft Word
5.2 Simplify Libre Writer
5.3 Add Extensions to Libre Writer
5.4 Create Your Own Custom Template

In Section 5.1, we will describe several benefits of Libre Office over Microsoft Office.

In Section 5.2, we will review how to easily simplify the interface of Libre Writer so that it has the word processing tools you like to use most readily available.

In Section 5.3, we will review how to add several free tools to LibreOffice.

In Section 5.4, we will describe how to create a Libre Writer template that can convert Writer Paragraph Styles into CSS classes – allowing us to use the same Writer Source document to produce Print Books, PDF Books, Ebooks, Websites and online courses.

5.0.01

One Source Document to Rule Them All!

5.1 Why Libre Writer is better than Microsoft Word

No matter what type of document you are writing, Libre Writer is better than Microsoft Word. Even if MS Office were free, you would still be better off using Libre Office. But the truth is that MS Office is not free. In fact, it is very expensive. The complete version costs $500 or paying a monthly fee from here to eternity. In this section, we will first review several different categories of documents and then describe specific benefits of using Libre Writer over Microsoft Word.

Libre Writer appears to be similar to MS Word 2003

On first impression, the Libre Writer menu looks very similar to the MS Word 2003 menu. This is in itself a benefit because millions of people around the world know how to use MS Word 2003 to create and edit their documents.

Libre Writer has Better Tools for creating complex documents

While Libre Writer looks similar to MS Word 2003, there is much more to it! In fact, Libre Writer offers a whole range of tools to create complex documents that are not present on any version of MS Word. To understand how Libre Writer is better than MS Word, we will first cover four different types of documents and then describe several benefits to show how Libre Writer is much better than Word for creating complex documents, like a 400-page book.

Four Types of Documents

Microsoft Word treats pretty much all documents the same. But LibreOffice comes with different levels of tools for different kinds of documents. Although there is some overlap, documents can be divided into roughly four categories:
Simple Documents like articles under 10 pages in length.
Complex Documents like chapters under 50 pages in length.
Multilevel Books like Print on Demand books under 400 pages in length.
Websites and Ebooks – which are the same length as a multilevel book but which have several additional characteristics.

Different Types of Documents require Different Kinds of Tools
When writing a complex 400 page book, one of the biggest problems any author runs into is trying to keep their book organized. Different types of documents require different kinds of organizational strategies and different kinds of tools.

Below is a table outlining four different types of documents and strategies for creating and organizing each of them.

Document Type

Maximum

# Pages

# Images

Move with

Outline Levels

Style Types

Simple Articles

10

20

Cut/Paste

One

Header Type

Manual Format Styles

Complex Chapters

50

100

Cut/Paste

Two

Header Types

Default Format Styles

Multilevel PDF and POD Books

500

800

Separate Folders

Three

Header Types

Custom Format Paragraph Styles

Ebooks &

Websites with Multiple Pages

500

800

Separate Folders

Three

Header Types

CSS classes in a Style Sheet
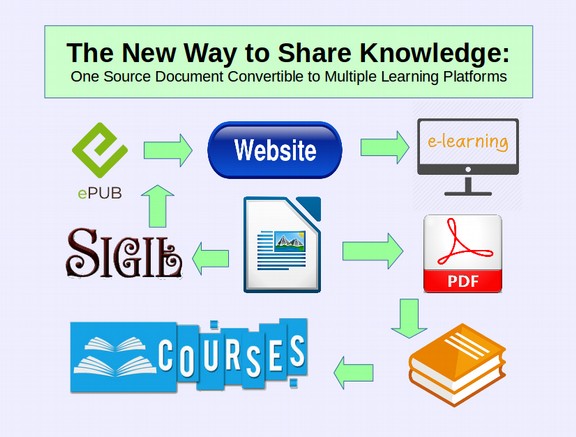
Websites and Ebooks

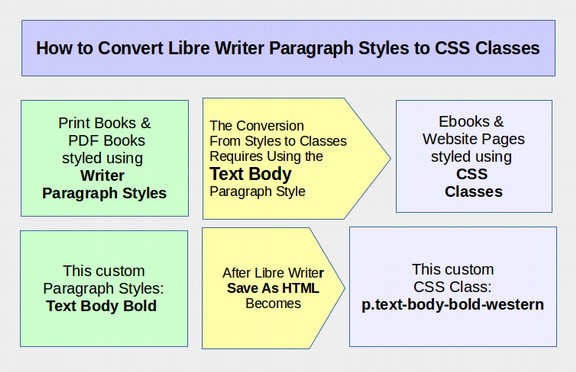
Websites and Ebooks are similar as both are formatted CSS style sheets. Libre Writer offers a pathway to convert custom Paragraph Styles to CSS classes – allowing us to use the same styles on our ebook and website as we used on our Print book and PDF book – all from a single Writer source document.

Websites and Ebooks both also require precise segregation of images – meaning that the images are actually separate files (such as JPEG files) which are placed in separate folders and then inserted as links inside of the HTML text document. Having spent many years building hundreds of websites and teaching courses in website design and construction, I am acutely aware of how difficult this process can be for the average writer. Libre Writer has numerous tools to make this image organization process much easier.

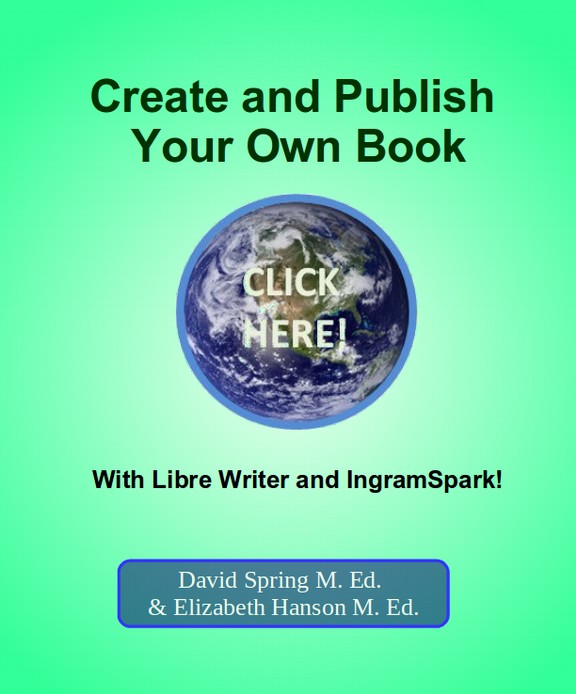
This is a very brief overview of Libre Writer tools for creating Print Books and Ebooks. Because this is a very complex topic, we cover how to use Libre Writer to create a Print book, PDF Book, Website and/or an Ebook in our next book - which is called Create and Publish Your Own Book. However, it is important to know that Libre Writer does a much better job helping you organize a complex several hundred page book than MS Word. The beauty of Libre Writer is that it not only works well for creating simple documents but it also has all kinds of tools for organizing increasingly complex documents. Libre Writer is designed to be not only a word processor - like MS Word 2003 - but also a book organizer.

Advantages of Libre Writer for Creating a Print or EBook

Microsoft Word tends to treat all documents as if they were simple documents. Using MS Word to write a complex document is like trying to build a house with only a hammer and a saw. On the other hand, Libre Writer includes the hammer and saw. But Writer also provides you with a set of blueprints for organizing the construction process and a whole team of specialists for doing the foundation, framing, drywall, plumbing and electrical tasks.

Seven Tools Libre Writer offers for organizing complex documents

The following are seven very important tools Libre Writer offers to help you organize your Print Book and/or Ebook. First, the Writer Styles Window allows precise control over every aspect of book. Second, the Page Styles function allows different formatting of different pages. Third, Writer Paragraph Styles can be tied into a Linkable Table of Contents. Fourth, Writer offers an incredible image optimization tool – essential for publishing an EBook or posting your articles to a website. Fifth, Writer paragraph styles can be linked to Ebook and website CSS classes. Sixth, Writer provides a way to export images into separate folders needed for ebooks and websites. Seventh, Writer offers advanced PDF import and export functions. Below, we will review all seven of these tools.

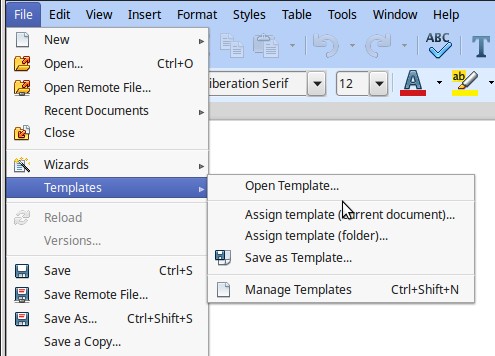
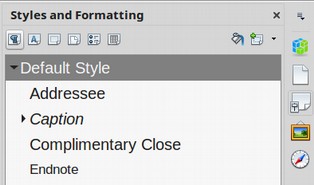
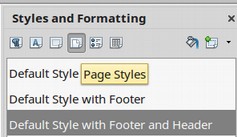
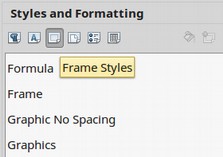
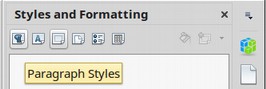
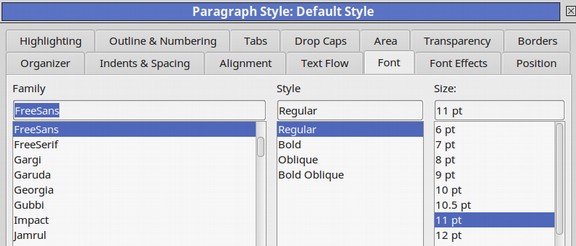
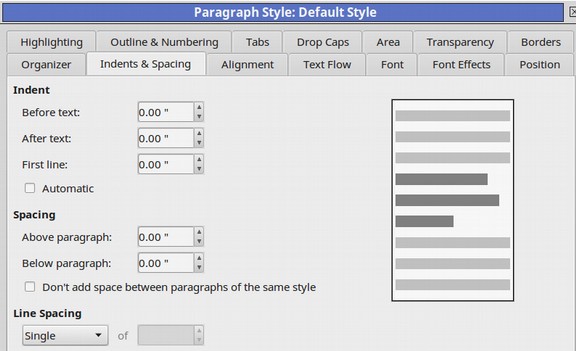
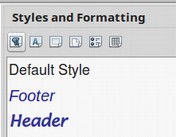
#1 The Styles and Formatting Window

A Writer Panel, Styles and Formatting, places all of Libre Writer's six categories of styles - paragraphs, characters, frames, pages, lists and tables - within easy reach allow us to easily create and modify the appearance of our book. You can quickly apply any style to your document in order to see what it looks like. To reach the Styles Window, go to Formatting, Styles.

5.1.01

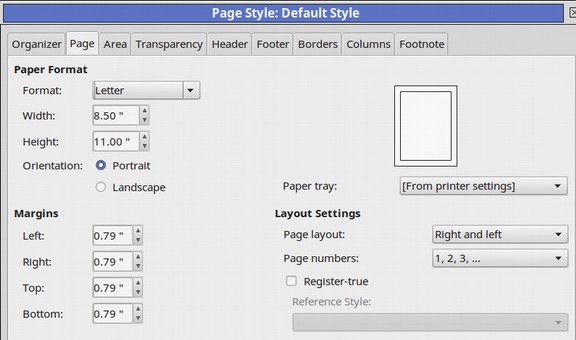
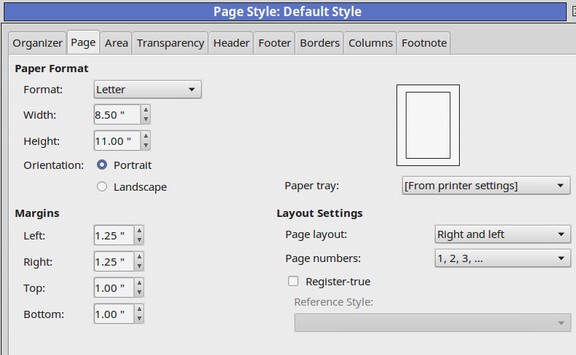
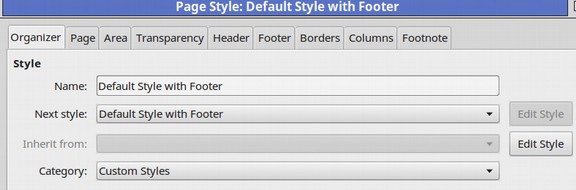
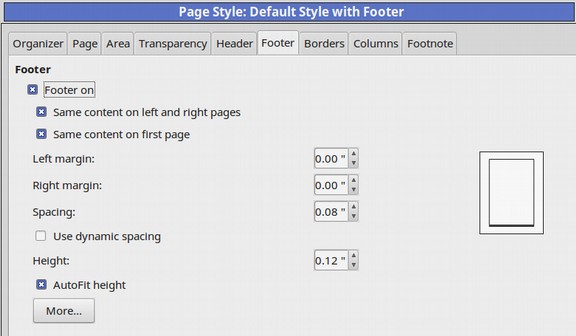
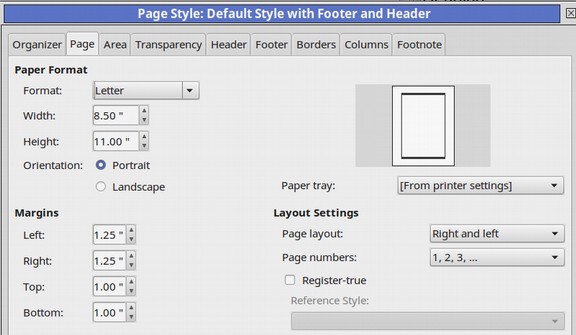
#2 Writer Page Style Options

In Word, you can adjust some limited page features such as margins columns. But all paragraphs have the same alignment and different formatting for different pages is difficult. Writer's addition of page styles gives you far more flexibility with much less effort. Since headers and footers are attached to Writer page style, you can use different header and footer styles automatically to create a different page layout for the beginning or front matter section of your book that you use for the main section of your book. To reach the Page Styles Default Style screen, go to Format, Pages.

5.1.02

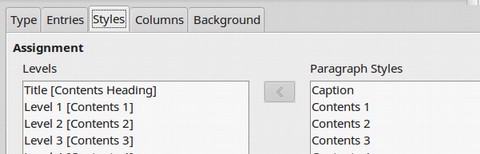
#3 Writer Paragraph Styles linked to your Table of Contents

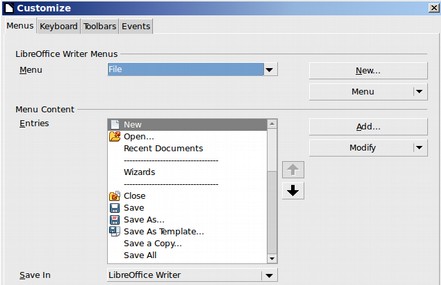
Word generates tables of contents using existing templates. However, the result is not editable, and invariably looks bad. Writer provides a far wider range of possibilities. You can adjust the position of all the components of a table of contents entry, or determine whether they appear at all. Each level of the table includes its own editable paragraph style, and, while Writer, like Word, assumes you will use heading styles to create entries, you can also manually enter other markers if you wish. The result is a far more flexible set of design options which can be easily edited and updated. To see the window linking the Styles to your Table of Contents, click on Insert, Tables of Contents. Then click on the Styles tab. Note that any style, including custom styles, can be attached to any Table of Contents.

5.1.03

#4 Writer Image Optimization Tool

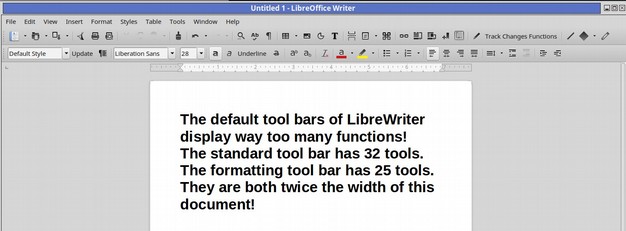
One of the most glaring shortcomings of MS Word is the lack of a quality image optimization tool. With Writer, all you need to do to optimize any image in any document is to right click on the image in the Writer document which bring up a whole selection of image adjustment options:

5.1.04

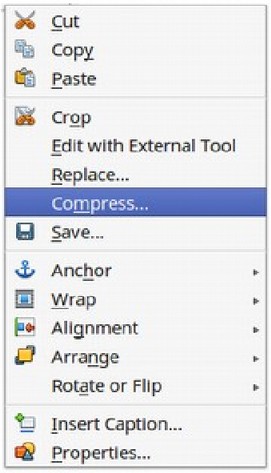
The most important of these for those wishing to publish their information as an ebook or web page is the Compress Graphic” tool.

5.1.05

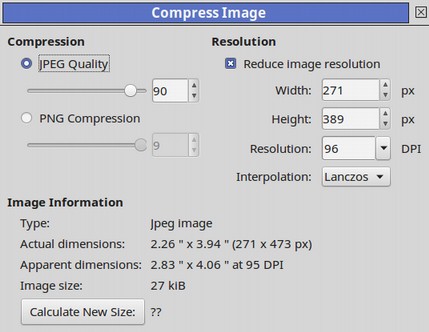
The tool automatically converts inefficient PNG images into efficient JPEG images. It is typical for image file sizes to be reduced by 80% or more – meaning your web page will load four times faster than if you had used images which were not optimized. In addition, PDF documents can be transferred much more rapidly if the images are optimized. Best of all, there is no noticeable loss of quality!

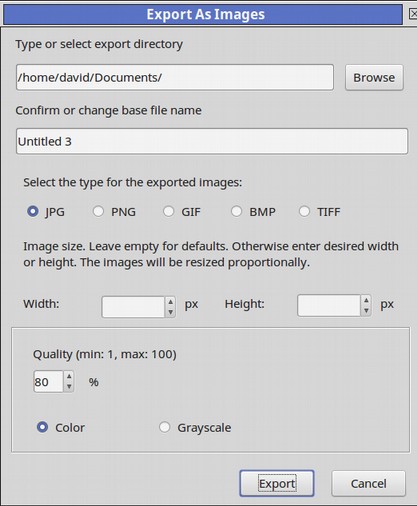
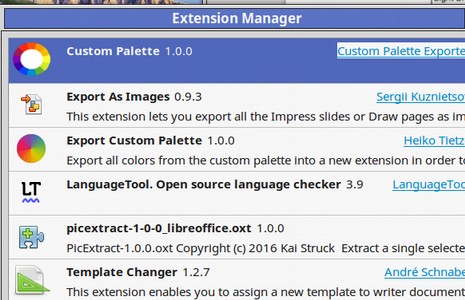
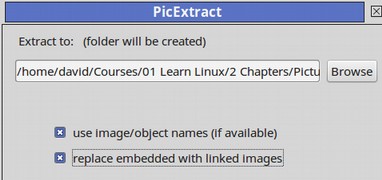
#5 Writer provides a way to export images into separate folders needed for ebooks and websites.

Writer provides an extension called PicExtract that allows us to export our images into a folder which in turn is linked to our HTML document during Save As HTML and thus can be used to load our images into our Ebook or Website. We discuss this tool more in Section 5.3.

5.1.08

#5 Writer paragraph styles can be linked to Ebook and website CSS classes

Writer comes with a simple conversion tool called Save As HTML Writer. This tool will not only convert our Writer document to an HTML document for our ebook and web pages, but it also converts our custom paragraph styles into matching CSS classes provided our Writer Paragraph styles have been properly structured. This allows us to use the same custom styles on our Ebook as we used on our Print Book. We discuss this feature in greater detail in Section 5.4.

5.1.06r

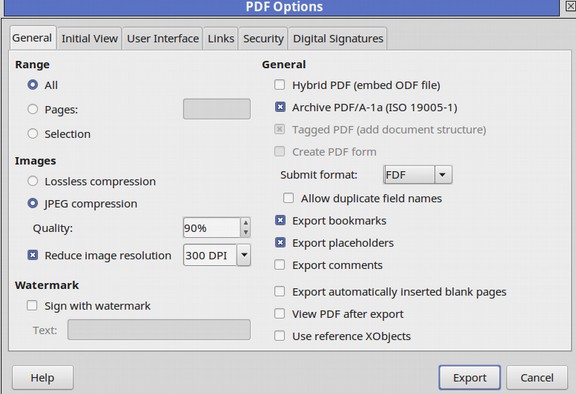
#7 Advanced PDF Import, Edit and Export Options

Both Writer and Word support saving a file as PDF. However, Word provides only basic options. Writer's Export to PDF function provides an exhaustive set of options for those who want them. Instead of Word's vague options for quality, Writer lets you set the exact image quality and resolution. You can also set exactly how links in the original are handled and set the details of the initial view for the PDF window. Most important, you can add a free tool to Libre Writer which allows you to not only create PDF documents - but also to import them and edit them! Given the importance of PDF creation to modern print on demand publishing, if you are writing a self publish book, you really should use Libre Writer. To reach the Libre Writer PDF export window, go to File, Export as PDF.

5.1.09

We will cover all seven of these tools plus many more in our next book, called Create and Publish Your Own Book. However, because Styles are so important even if you are not writing a book, we will spend some more time on this topic in Section 5.4.

History of Libre Office

Once you learn what a powerful word processing tool Libre Writer is, you might start to wonder where such an incredible tool came from. The answer is that it was created gradually over a period of several years by thousands of programmers working in the open source community. It all started with a free open source word processing program called Star Office which was created in Germany and brought to the US in 2001 and renamed Open Office. In 2010, Open Office became encumbered with commercial conflicts. The majority of Open Office developers left and started a new free open source project called Libre Office. Initially, Libre Office was a clone of Open Office. However, over the past eight years, thanks to the work of thousands of contributors, Libre Office has made huge strides in first matching and then passing Microsoft Office and Open Office. For example, Libre Office is much better than Open Office at importing, saving, editing and exporting Microsoft Word documents. In 2016, Libre Office reported 120 million users with 1 million new users every week. Thus, by 2018, Libre Office will have over 200 million users – with about half of these users running the Windows OS and the other half running LibreOffice on Linux OS.

Five Advantages of Libre Writer over MS Word for simple documents

There are at least five major advantages of Libre Writer over MS Word for creating simple documents.

First, LibreOffice Writer costs much less. In fact, it is free.

Second, LibreOffice is easier to install and requires less space on your computer.

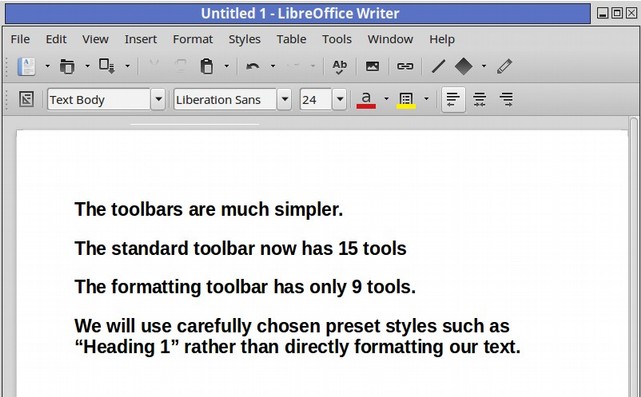
Third, Libre Office is easier to use because it uses a single well structured menu (like Word 2003) rather than the ever changing “ribbons” of Word 2007, Word 2010 and Word 2013.

Fourth, Libre Office is the world's most compatible and versatile word processor. It can convert between file formats and open different file formats. It can also run on several different operating systems.

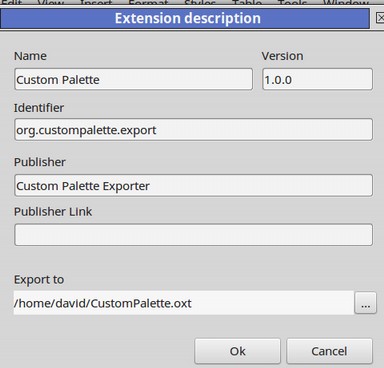
Fifth, Libre Office also offers 650 additional free tools, called extensions which can be added to Libre Office from the Libre Office Extension directory.

Below we offer more details about each of these five advantages.

5.1.10

#1 Libre Office costs much less. In fact, it is free
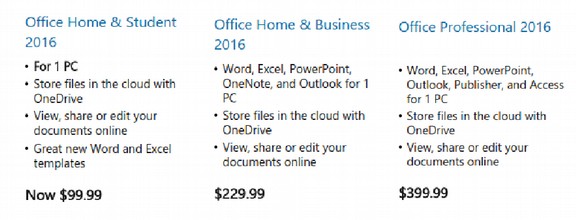
Even if MS Office were free, you would still be better off using Libre Office. But the fact is that MS Office is not free. In fact, it is incredibly expensive. The complete version, with Publisher costs nearly $400 per computer! A big change in Office today compared to past versions of Office is that instead of it being licensed for one user, it is only licensed for one computer. So if you have three computers in your house, and you want to use Outlook and Publisher, you are looking at spending $1,200. This is on top of what you paid for your computers.

To offset this dramatic increase in price, Microsoft is now also offering something called Office 365. This allows you to rent Office for about $10 per month. Over the normal five-year life of a computer, this comes to $600. Now imagine you are running a small business with ten employees. To figure out what Office will cost, just multiple all the above numbers by ten. So the first reason move to Libre Office is to get off of the Microsoft price increase treadmill!

#2 Libre Office is easier to install and requires less space on your computer

One of the biggest advantages of Linux Mint over Microsoft Windows is that Linux Mint comes with the world’s best word processor - Libre Office - for free and it is preinstalled on Linux Mint! By comparison, Microsoft Windows does not come with any word processor – and to get MS Office will cost you hundreds of dollars. To install MS Office, you need to first go to the Microsoft store and set up an account and give them your credit card number. You eventually get to the Download page and have to load this huge Office program file. If you are using Office 365 you also get the joy of paying monthly bills with your credit card. But with Libre Office, if you are using Linux, it is already preloaded. If you are using Windows and want to add Libre Office, it is a simple matter of just clicking on a couple of buttons. As for space, MS Office requires 3000 MB on your hard drive. Libre Office is only 545 MB.

Download and Install Libre Office for Windows

There is no need to download or install Libre Office if you are using Linux. It is already there. However, if you want to try Libre Office side by side with MS Office while in Windows, you can easily download it and install it. To get a free download of Libre Office for Windows, go to their website: http://www.libreoffice.org/

Then click on Downloads. Or go straight to the Downloads page. http://www.libreoffice.org/download/libreoffice-fresh/

Click on the Main Installer to download the file. Then save the file and the help pack in your Downloads folder. Then run the Libre Office file as an administrator to install it onto your Windows computer.

5.1.11

Then click on Writer to create a new document. There should now be a Libre Office icon on your desktop. It doesn't get any easier than this!

#3 Libre Office is easier to use because it has a traditional menu

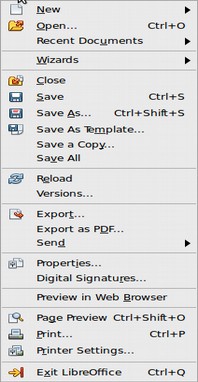
For many years, Microsoft used a simple fixed menu to allow access to important functions. Below is the Office 2003 Word simple Menu.

5.1.12

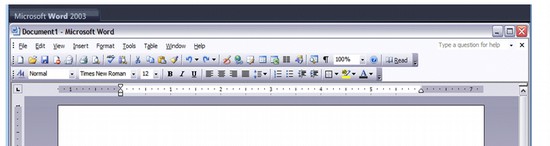
You use to be able to customize this menu in many ways to have quick access to whatever tools you used most. Each of the main tabs such as File, Edit and View offered fixed vertical drop down menus so that it was very easy for even a novice to learn and remember where various tools were at.

MS Word Replaces a Simple Fixed Menu with an Every Changing Ribbon
With Office 2007, the simple fixed menu was replaced with a complex ribbon:

5.1.13

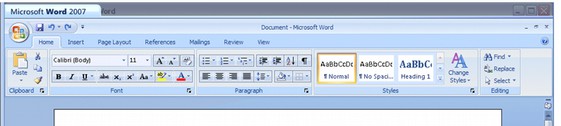
The File tab from Word 2003 was replaced by a Windows icon in the upper left corner. This was very confusing to many novices. Clicking on the Home Tab, the Insert Tab or any other tab displayed a new horizontal menu called a “ribbon” instead of the traditional drop down menu. Above is the ribbon for the “Home” tab. The problem with the ribbons is that each contains many more choices than the simple 2003 Word vertical drop down menus. This not only meant a steeper learning curve – but also slowed down word processing as you had to look through many choices to find the one you want. Folks describe it as looking for a needle in a rather big hay stack. In addition, many of the functions were indicated only by a very small icon – rather than the text menu items used with Word 2003. Thus, one also had to remember what each icon did. Having been an adult education instructor for more than 20 years and having taught many students both Word 2003 and Word 2007, I can say for certain that the fixed menu is easier for students to learn than the variable ribbon. Below is the Home tab on the Office 2013 Word menu.

5.1.14

Office 2010 was an improvement over the 2007 Word menu because it replaced the terrible Windows icon with the traditional “File” tab. But it still used the crazy ribbon. Thus many still felt like they were looking for a needle in a haystack.

There is a new tab called Design which covers some of the functions which used to be in the Insert tab or the Page Layout tab. This is a slight improvement because it places fewer choices on the Insert and Page Layout tabs. However, the SAVE and SAVE AS function have gotten much worse. Clicking on File brings up the same options.

But click on File, then click on Save or Save As and you will be in for a big surprise. The Save function now defaults to Sky Drive (if you do not like Sky Drive, then too bad for you). The Save As function adds an almost useless intermediary screen to slow you down.

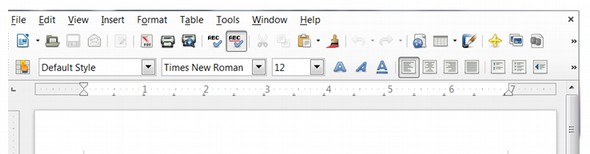
The Libre Writer Menu

Here is the Libre Writer Menu in Windows (which uses Times New Roman).

5.1.15

Here is the Libre Writer Menu in Linux Mint (which uses a font called Liberation)

5.1.16

This simple fixed and predictable menu is the best part about Libre Office. If you have a Windows XP computer with Word 2003 – which is the case with one in three computer users today – then you will have a much easier time using Libre Office than using MS Office. Even if you have spent the past several years using MS Word, you will have an easier time using Libre Writer that MS Word.

#4 Libre Office can convert between file formats and open different file formats without subjecting users to fake warnings

Libre Office Writer is not only compatible with all versions of Microsoft Word and Excel, it is also compatible with Microsoft Publisher and Adobe PDF. It is also compatible with HTML formatting used to create websites and e-publishing documents. It has also resolved issues of past open source programs in providing a more consistent display of tables, headers and footers. You do not even need to install Linux to use Libre Office. Libre Office 5 comes in versions for Windows, Apple and Linux. It is time for all of us to join the 200 million people already using Libre Office!

Libre Office Writer offers many Compatibility Tools

Any time you want to open and work with any document with Libre Office, just click on this icon to open Libre Office. Then click on the “Writer” icon to bring up the Writer document edit screen. You can create the document in Libre Office and then save it as a ODF or a Word document or even an HTML file.

5.1.17

ODF = Open Document Format which is the standard Open Source document. The ending extension for an ODF document is odt.

LibreOffice Writer also comes with a Document Conversion Wizard for converting documents between LibreOffice and MS Office. Open any doc or docx document with LibreOffice Writer, then click on File, Wizards, Document Converter.

5.1.18

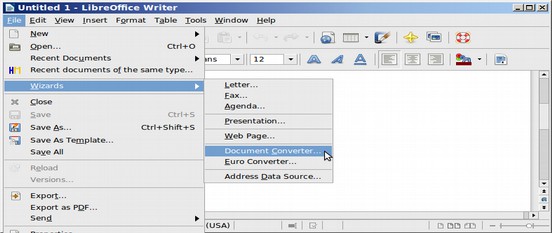
This brings up a simple tool for converting three major types of Word documents.

5.1.19

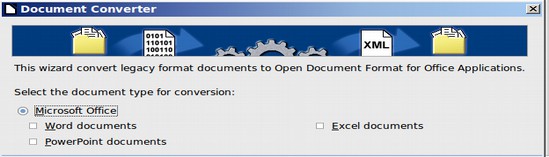
Select Word document and LibreOffice Writer will then create a copy of all MS Word Doc and DocX documents to ODT files – while still retaining all the MS Word Doc and DocX files. I was able to convert 268 Doc and DocX files to ODT documents in a matter of a couple of minutes using this tool. Libre Office also comes with a Web Wizard which can turn your document into an Ebook. Just click on File, Wizards, Web Page Wizard.

Conversion Issues and MS Office Sabotage

There is almost no problem converting between MS Word 2003 DOC documents and Libre Office ODT documents. The one real exception to this rule is that Word text boxes do not convert well. Text boxes should therefore be changed to images before conversion. There is also not much of a problem using Libre Writer to convert Libre Office ODT documents to MS Word 2007 DOCX documents. However, there are occasionally problems using MS Word to convert DOCX documents to ODT documents. The biggest problem is that DOCX documents handle images in a much different way that ODT or DOC documents. There is no benefit to the way DOCX handles images.

Instead it appears to be a deliberate attempt to punish people who use either DOC or ODT documents. It creates compatibility problems which force people to buy the latest version of MS Office. For this reason, if you have friends who you want to share a file with who use MS Office, we recommend that you create the file as a Word 2003 DOC file rather than a Word 2007 DOCX file.

With recent advances by Libre Office, you may be able to save ODT documents as Word 2007 documents and have the images turn out okay. Just check the file after you create it. Sadly, Microsoft is also working hard on making DOCX not compatible with Libre Office, so be careful and do not assume anything.

Real versus Fake Warning Messages

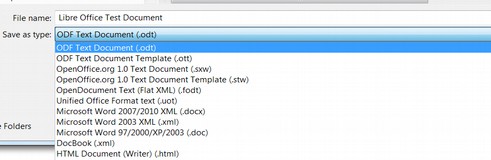
Libre Office gives you a standard warning when saving an ODF document as a Word document:

5.1.20

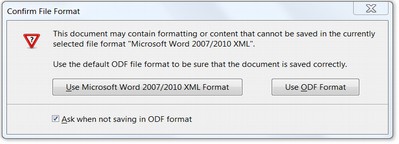
Usually, the correct formatting is preserved over 90% of the time. So feel free to convert ODT documents to Word documents and Word documents to ODT documents. Libre Office is very compatible with Word 2003 and usually compatible with Word 2007, Word 2010 and Word 2013. If you are working with something really important, first make a copy of the document. Then convert the copy. Then check the document for the correct formatting after you have saved it. However, the warnings are much more ominous when using MS Office. MS Office claims that it can open an ODT document. Try it and you get this warning:

5.1.21

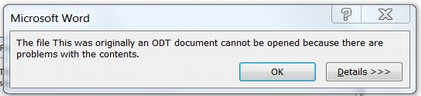
There is actually no problem with the ODT document, but Microsoft is trying to fool you into thinking that Libre Office is not a good program. Click on OK and you will get yet another ominous warning:

5.1.22

Click Yes and the document opens without any problem. However, it does not open as an ODT document. Instead it opens as a Word document! This kind of conduct is revolting. It is dishonest manipulation. Then try to save a Word document as an ODT document and you will get this warning:

5.1.23

Click Yes and there is no problem saving the document. Then close MS Office and open Libre Office and open the new ODT document. What you will find is that there is no problem at all with the document.

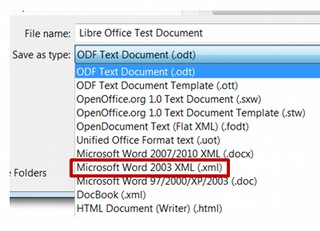
So even though Libre Office and MS Office both claim to be able to open and save documents in many formats, only Libre Office does it without ominous warnings. The warnings above are exactly the kind of fake warnings Microsoft used to destroy DR DOS and Word Perfect in the early 1990s. Despite two different federal courts telling Microsoft to stop doing this, Microsoft continues to lie to computer users in an effort to maintain their monopoly. Given that nine out of ten users still use and share Word doc or docx files, I still recommend sharing documents as Word 2003 doc files. This means using the Libre Office SAVE AS button and then selecting doc instead of the default open document text file format (which uses the odt extension). Because few people are aware of Microsoft’s attempts to sabotage Libre Office, it is best to simply save any documents you want to share as Word 2003 documents in order to avoid frightening your friends.

5.1.24

Another option is to save any document you want to share or email as a PDF. Both Libre Office and MS Office can save documents as PDF documents – but with Libre Office, it is not done through the Save as type function. Instead it is done through File, Send As and then select PDF.

#5 Libre Office offers 200 additional free tools, called extensions which can be added to Libre Office from the Libre Office Extension directory.

These tools, themes and templates allow you to even further customize and expand the ability of your Libre Office word processor. We cover how to add extensions to LibreOffice Writer at the end of the next session.

What’s Next?

In the next section, we will first review how to customize the LibreOffice Writer menu bar and tool bars. We will then demonstrate how to add an extension and provide a list of recommended extensions.  

5.2 Simplify Libre Writer

While Libre Writer works better than MS Word even with no changes, there are many steps you can take to improve the appearance and performance of Libre Writer. In this article, we will show you how to get the most out of Libre Writer. Just as we made several changes to improve the appearance and performance of Linux Mint, we will review simple steps you can take to make Libre Writer even easier to use.

5.2.01

In this section, we will make the following changes to Libre Writer:

#1 Simplify the Writer Main Menu
#2 Simplify the Standard Toolbar
#3 Simplify the Formatting Toolbar
#4 Turn off Word Completion
#5 Customize Tools Options

#6 Greatly Increase the Graphics Cache
#7 Change the Path to the Default Pictures folder
#8 Change the Path to the Default Templates folder
#9 Change the Default Fonts
#10 Increase the Number of Recent Documents
#11 Reduce Time for Save AutoRecovery
#12 Stop Hidden Files from Showing in LibreWriter

Let’s review the why, where and how of each of these changes:

#1 Simplify the Writer Main Menu

Below is the default menu of LibreWriter. When you first open LibreWriter, it has a very complex and cluttered menu and workspace. There are so many tools and icons that many of them are off to the right on the screen. There are even more tools in the right sidebar.

5.2.02

Since we will be using LibreWriter extensively for writing, organizing and formatting our sections, chapters and books, it is worth taking a few minutes to simplify this menu – leaving only the most used icons. First, let’s look closer at the various parts of the LibreWriter workspace:

Title Bar, Main Menu, Standard Toolbar and Formatting Toolbar

The top row is the title bar. The second row with words is the menu bar. The third row is the standard tool bar and the fourth row is the formatting tool bar.

5.2.03

Simplify the Main Menu

The first step in simplifying LibreWriter is to edit the main menu. The second row is the Main Menu. It has nine menu items which work in almost the same way as Word 2003. We can eliminate any of the items in the drop down menus if we feel we do not need them. For example, the File Menu item has a huge submenu.

5.2.04

Do we really want to look at all of these choices if there are some we will never use? To get rid of Digital Signatures, click on Tools, Customize, Menus.

5.2.05

Make sure it is set for the File Menu. Then scroll down to Digital Signatures and click Modify, Delete. Then click on the File menu to confirm the change. Make similar reductions in the Edit Menu. Next open the View Menu. The first thing we will do is turn off the ruler by going to View, Ruler and unchecking the box to the left of the word Ruler. This will give us more space in the Workspace and make our display screen and screen shots less confusing.

5.2.06

We will uncheck the Status Bar, Hidden Paragraphs, input Method Status and Sidebar. We will also uncheck the ruler. These changes can be made and carried forward to new documents without opening the default template.

Why We Should Simplify the Writer Tool Bars

The default toolbars have so many functions that they are twice as wide as a typical Writer document!

5.2.07

There are at least three reasons to simplify the toolbars by hiding many of these functions. First, nearly all of these functions can be accessed from the main menu. Second, we want to use carefully selected styles rather than direct formatting in order to keep our code clean and our text consistent for books, ebooks and websites. Hiding direct formating functions will help remind us that we want to use styles instead of direct functions. Third, we want to be able to view all functions while displaying two documents (or one document and one web browser) side by side:

5.2.08

Next, we will simplify the Standard Toolbar. We will then simplify the Formatting Toolbar.

#2 Simplify the Standard Toolbar

The benefit of customizing a toolbar is to add any icons you like to use and hide any icons you never use. To customize any toolbar, go to View, Toolbars, Customize. This brings up the same Customize Window we just used to simplify the Main Menu.

5.2.09

Click on Toolbars to bring up the Standard Toolbar Edit screen:

5.2.10

To add a command or icon, check on it. To remove an existing command, uncheck its box. Scroll down and uncheck the following: Export as PDF, Print, Print Preview, Clone Formatting, Find and Replace, Non Printed Character, Insert Table, Image, Chart, Insert Field, Special Character, Insert Footnote, Insert Endnote, Bookmark. Comment, Record Changes, Show Drawing Functions.

#3 Simplify the Formatting Toolbar

To customize the formatting toolbar, click View, Toolbars, Customize to go back to the Toolbars Tab. Then use the Drop down arrow to the right of the word Standard to select the Formatting Toolbar. We will uncheck: Update Style, New Style, Bold, Italic, Underline, Strikethrough, super script, sub script, Clear Direct Formatting, Bullets, Numbering. Justify, Line Spacing, Increase Spacing, Decrease Spacing. Increase Indent, Decrease Indent. Left to Right. Right to Left and Highlighting. Then we will add a command called Background Color. Then click OK. We now have a much simpler menu that will be easier to work with.

5.2.11

#4 Turn off Word Completion

A common complaint about LibreOffice Writer is its very annoying word completion function. This is a function which tries to complete long words for you. The problem is that, most of the time, it guesses wrong and makes it harder for you to type in the word you really want to use. To turn off Word Completion, go to Tools, AutoCorrect, AutoCorrect Options. Then click on the Word Completion tab.

5.2.12

Uncheck Enable Word Completion. Then click OK.

#5 Customize Tools Options

Our next task is to modify a few of the settings on the Tools, Options window. Click on Tools, Options. In User Data, type in your first and last name to automatically add this data to every document you create.

5.2.13

#6 Greatly Increase the Graphics Cache

Next, click on Tools, Options, LibreOffice, Memory. By default, the LibreOffice Graphics cache is set for a mere 20 MB. If you never put more than 10 images in a document and each image is under 2 MB, this might be OK. But when writing book files and website files, I often have more than 20 images per document and occasionally over 50 images per document. Even with all of these images being optimized or compressed to reduce the image file size, we will need more than 20 MB. We will also be adding many other objects besides images.

5.2.14

We will increase the Graphics cache to 200MB. Also increase Remove from memory to 30 minutes. Finally, we will raise the number of objects from 20 to 50.

#7 Change the Path to the Default Pictures folder

A problem with LibreWriter is when you click on Insert Picture, From File in either Libre Writer, Libre Draw or Libre Impress, you are taken to a very strange hidden images folder called gallery.

5.2.15

Our Nemo File Manager comes with a folder called Pictures. But we are using that folder to hold all of our screen shots taken with Shutter. Since we need an easily accessible folder for our LibreWriter images, we will use our Nemo file manager to create another folder called 0_my_images which is at the top level of our Home folder. We can then make this the default images folder for LibreOffice by going to Tools, Options, LibreOffice, Paths:

5.2.16

Click on Images to select that path. Then change the path to the Images folder to /home/david/00_my_images. First, select the images row. Then click Edit. Then navigate to the folder you want to use. Then click OK.

#8 Change the Path to the Default Templates folder

The templates folder has also been put in a very strange place. We will review how to create our own template in a later section. For now, we want to change the default template folder to the Templates folder in our Mint File Manager. Go to Tools, Options, Paths and select Templates. Then click on Edit. Then click Add. Then select the Mint Templates folder. Then click OK. Then click OK again.

5.2.17

#9 Change the Default Fonts

By default, LibreWriter uses whatever font is the default font for the operating system. To see this setting, click on Tools, Options, LibreWriter, Basic Fonts (Western).

5.2.18

In Linux Mint, the default font is Liberation Sans Serif Size 12. We can override this setting by creating our own template, which we will do later. But for now, because Sans Serif is more legible on computer screens, we will change all the above options to Liberation Sans Serif. This will automatically change the font in the default paragraph style which we will look at more closely later.

#10 Increase the Number of Recent Documents

When you first open LibreWriter, it is common to look through a list of Recent Documents to find one you recently worked on and would like to use again. This list is found by going to File, Recent Documents. By default, the maximum number of Recent Documents stored in LibreWriter is 25. When you are working on writing a book or research report, you will almost certainly want a list of many more recent documents than this. In the past, we increased the number of recent documents by using a free extension called History Manager. Recently, LibreOffice has added a simple way for us to increase the number of recent documents in the Tools, Options screen. Just scroll down to the Advanced tab.

5.2.19

Then click Open Expert Configuration. This will bring up a list of functions we are able to change.

5.2.20

Scroll down the list to Common and click on it to open it. Then find the History line and click on it to open it.

5.2.21

Under Pick List is a line called History that has a Property called PickListSize. Click on this line to edit this property. Increase the Value from 25 to 99. Then click OK. Then click OK again and again. Now every time you open and close a new document, the list of Recent Documents will increase all the way up to the last 99 documents.

#11 Reduce Time for Save AutoRecovery

In Tools, Options, click on Load/Save, General. In the Save section, you’ll see that by default, LibreOffice automatically saves your document every 15 minutes. Reduce this to 10 minutes to reduce the amount of changes your will lose if your computer freezes up and you are forced to restart your computer. We could even lower this to every five minutes. However, our work would have to stop for every save. So 10 minutes is a reasonable compromise.

#12 Stop Hidden Files from Showing in LibreWriter

When we click on File Open from a Libre Writer document, then click on the Home folder, a bunch of folders appear with a dot at the beginning of the folder name that should not appear.

5.2.22

To hide these folders, from an open document, click File Open. When the file manager comes up, right click in the workspace. Uncheck Show Hidden Files.

5.2.23

This only needs to be done once. After this, whenever you click file open from LibreOffice only the normal folders will show.

5.2.24

What's Next

This completes our simplification of LibreOffice Writer. In the next section, we will add some free extensions to expand the function of LibreOffice. 

5.3 Add Extensions to Libre Writer

In the last section, we fine-tuned the appearance of our LibreWriter menu. In this section, we will add six free extensions to LibreOffice, Template Changer, Language Tool, Export As Images, PicExtract, Custom Palette Export and Custom Palette Imported.

#1 Add Template Changer to Allow Us to Assign a new template to an existing document
You can convert and even batch convert your MS Word documents into LibreWriter documents in a matter of minutes. But let’s say you have your book documents in LibreWriter but you made them using the default template rather than your own book template – and now you want to switch all of these documents to your new custom template. Since all new documents will use the new template, assuming you have assigned it as the new default template, you could open a new document and copy paste the old document into the new one. But there is an easier solution. Download the latest version of Template Changer. To reach the LibreOffice Extensions directory, go to http://extensions.libreoffice.org/

Then click on Extensions. The click Writer Extensions. Click on the second page and you will find Template Changer. This will allow us to easily change templates when moving between various formats of our source documents. Click on Template Changer to go to its download page.

5.3.01

Normally, we would scroll down the page. Then click on Template Changer to download it. However, the version currently on this page is the outdated version 1.2.6. We will instead download the most current version 1.2.7c from this link:https://bugs.documentfoundation.org/attachment.cgi?id=103039&action=edit

Then transfer the file from your Downloads folder to a LibreOffice Extensions folder. Then go to Tools - Extension Manager in LibreOffice and click Add to install the extension.

5.3.02

Then save and close all documents and restart LibreWriter. You can now go to File - Templates - Assign Template (current document) to select the updated template that you want applied.

5.3.03

Important Tips about Changing Templates in Midstream

Templates are an important tool in creating documents – especially for creating book documents. They allow us to precisely define a particular page layout and style format that we can consistently apply to every document that will be making up our book. LibreOffice is the best tool in existence for creating books because it allows us the most control over our templates and style formatting. Ironically however, by default, LibreOffice does not assign a template to a new document! You can see this by opening a new document, then click File, Properties:

5.3.04

LibreWriter comes with several preinstalled templates – including a template called Default Template. But the “Default” template is not assigned as the Default template! Thus, the Template properties of every new Writer document will be blank. Actually, LibreWriter does have a “hidden” template that it uses to format new documents when you click File, New Text Document. But we have very little control over this hidden template. We can change the default font from Sans Serif to Sans in Tools, Options. However, any style changes we make to one document will not be carried over to the next new document unless we assign a default template to all documents – and then modify our default template to the styles we want to use. We will soon describe how to make your own default template to give you more control over LibreWriter document formatting. However, before we do that we should point out some precautions about trying to change templates in mid-stream with or without template changer. First, there is another way to change templates without using template changer. Click on Styles, Styles and Formatting to bring up the Styles and Formatting Sidebar:

5.3.05

In the upper right corner, just below the X is a drop down arrow for an icon called New Style from Selection. Click on this arrow. Then click Load Styles. This will bring up the following window:

5.3.06

By default, this screen shows the templates in our My Templates folder. If we had created any custom templates, they would appear in the templates box. Click on Styles and you will see templates called Default and Modern. We could assign our existing document to either of these templates by clicking on one of them. But we will not assign a template for right now. Instead, click Cancel to close this screen. The Template Changer Extension is just an easier way of changing templates than going through the above process. A drawback of just assigning a template to a document when we do not fully know what settings are used by the template is that we can have unexpected results. Templates not only define Paragraph Styles, they also define page layout styles, Page Margins and even Graphic and Image Property settings. This is why we will be shortly focusing on how to create our own template rather than using a template made by someone at LibreOffice.

You should also note that if a custom template uses custom styles with custom names, these custom styles may not carry forward from our existing document to a new document even though we assigned the custom template to the new document and the custom template includes our custom styles. Even if we do assign these custom styles manually to our new documents, there is still a possibility that these custom styles will not be picked up by book printers and Ebook readers. This is why we do not recommend and will not be using custom styles. Instead, we will be modifying existing so-called normal styles.

In addition, changing a template for a document with more than about 10 images is likely to cause problems for the document including things like seeing the document suddenly skip to the end of the document every time you add a new image. The only effective solution to this problem is to open a new blank document with the new template you want to use. Then Select All and copy paste the current document into the new document. This is why it is best when writing big long documents with lots of images to set up your book template before you start writing your book documents.

Also, and perhaps even more important, assigning a new template to an existing document will not change any Direct Formatting in the existing document – because Direct Formatting always over-rides Style Formatting. This is why we do not recommend Direct Formatting. If you have a document with a lot of Direct Formatting that you created in the past, you should copy it over to a new document using the new template – keeping your old document as a reference. Then click Select All – Format, Clear Direct Formatting.

5.3.07

Then go through the document using your old reference document as a guide and apply styles to every place you had applied Direct Formatting. This is the only way to ensure that your print book and Ebook will come out looking the way you intended. Using Styles instead of Direct Formatting will also allow you to quickly change your styles should you decide a different style would look better.

Last, once we apply a template to a document, any time we change the template assigned to a document, and then open any document using that template, a screen will appear asking us if we want to update the template that document is based on. In general, we should click Yes. If we do not click Yes, then the document will forever be stuck with the old version of the template! For all the above reasons, while it is nice to have an easy Template Changer, we should think twice about if and when we will use it.

#2 Language Tool for LibreWriter

The next Writer Extension we will install is a grammar checker called Language Tool. Here is the direct link:
https://extensions.libreoffice.org/extensions/languagetool

Transfer this Language Tool from your Downloads folder to your LibreOffice Extensions folder. To install it, go to Tools, Extension Manager and click Add. Then close all documents and restart LibreOffice. Open a document you want to check. Then click Tools, Language Tool, Recheck Document.

5.3.08

#3 Export as Images for LibreImpress

This extension will allow us to export our Impress slideshow as a series of JPEG images which can be used to create the same slideshow on our website. Here is the direct link: https://extensions.libreoffice.org/extensions/export-as-images

Then open an Impress Presentation and click on File, Export as Images:

5.3.09

Choose where you want the images to go, then click Export.

#4 PicExtract

This extension will allow us to export our images from any Writer document into a separate folder. This folder is then linked to our HTML document during Save As HTML Writer when creating Ebooks and web pages. Here is the link to download this important tool. https://extensions.libreoffice.org/extensions/extract-embedded-images-and-replace-embedded-images-with-linked-images-picextract

To use this tool, install it with Tools, Extension Manager. Then make sure all the images in your document have been properly named by right clicking on each image, click Properties, then click the Options tab and change its name to match the chapter and section name for the image. For example, this is the eighth image in Section 5.3:

5.3.10

Once all of our images have been properly named, make a copy of your Writer document and place it in a separate folder. Then click PicExtract in the main menu. Check both boxes (Use Object Name and Replace Embedded with Linked Images). Then click OK. All images will be extracted from the document and placed in a separate folder. After this is done, before taking any other steps, click File, Save As HTML (Writer) to create our linked HTML document. This HTML document can then be opened in a free open source program called Sigil for further editing before conversion into an Epub document and or web page.

Caution

b5.3.01

Do Not Use PicExtract with the original version of your Source Document. While it make look the same. The images will no longer be properly embedded into your source document and will therefore disappear the moment the link is broken to the images folder! Always make a copy of your source document and put it in a separate folder just before using PicExtract. Also note that PicExtract will not work if you have any Text Boxes in your document. Text boxes, if needed, should be replaced with the same content in a single cell table.

#5 Custom Palette Export

This tool allows us to create a custom image folder with the colors and gradients we want and then download that custom color folder to our computer. Then when we upgrade to a newer operating system or get a new computer, we can install the colors palette to the new computer. We can also post our color palette online where others can download it and add it to their computer. Here is the direct link to this extension. https://extensions.libreoffice.org/extensions/custom-palette-eport/1-0.0

After it is installed, restart LibreOffice and open a Draw document. Click on Format Area. The Standard Palette has mainly dark colors not suitable as a background for text.

5.3.11

We will therefore make a Custom palette with a range of very light background colors. Click on the drop down arrow to the right of the word Standard and select the word Custom. The default custom colors screen is blank.

5.3.12

To add a new color to our Custom palette, click on Pick, then change the Hex value for our new color to EEEEFF. Then click OK. Then click Add. Name the color Light Blue.

5.3.13

Then click OK. Repeat for other whatever other light colors you want. To export your custom palette, from LibreDraw, click on Tools, Export Custom Palette. Name the palette Custom Palette. Then click OK.

5.3.14

#6 Custom Palette Import

After we create a custom palette, we can add our custom palette with the Extensions Manager. First, we must add our custom palette file, created with the Custom Palette Export Tool, with our Extensions Manager. Click Add. This is what our Extensions Manager now looks like:

5.3.15

Then restart LibreOffice and open a LibreDraw document and go to Format Area, Color tab. For Palette, select Custom Palette:

5.3.16

These are the 16 custom background colors we will use during this course and several other courses. We will have this Custom Palette file available to download on many of our websites.

What’s Next?
Now that we have all of our LibreOffice extensions installed, in the next section, we will add our custom default template and review a few basic style settings.  

5.4 Create your own Custom Template

In this section we will review how to create your own custom template – which can then be used as a model for creating all of your future documents and all of your future templates. A template is a special document which is used as a pattern for creating other documents. The template we will create is specifically designed to be a source document for creating not only print books and PDF books but also for creating Ebooks, web pages and online course pages. This is because the custom Paragraph Styles we will create will be automatically converted by Libre Writer to Custom CSS Classes during File Save As HTML Writer conversion.

A Look at the Default Template
Libre Office Writer comes with a predefined template which cannot be easily changed. It can be found by going to Tools, Options, LibreOffice Writer, Basic Fonts. In a previous section, we changed the settings in this screen from Liberation Sans Serif to Liberation Sans.

5.4.01r

The problem with this screen is that it is not a real template. A real template would allow us to set the page margins, footers, headers, image properties and make dozens of other formatting decisions. In order to control all of these settings, we need to create our own custom template.

Create your own custom template

To create a new blank template, click on File, New, Text Document to open a new blank page. We can turn any document into a template by clicking on File, Templates, Save as Template.

5.4.02

Give it a name such as My Default Template and check the box to make it our default template. Then assign it to the My Templates category and click Save. To review and edit our new default template, go to File, Templates, Manage Templates.

5.4.03

Right click on My Default Template. Then click Edit.

This will open the template – which will look like a new blank Writer document – with one major exception. At the top of the screen, you will see that the file name ends with an OTT extension rather than an ODT extension. This OTT ending extension tells us that this is a template and not a normal Writer document.

5.4.04

So far, our template is the same as the default template in Tools, Options, Libre Writer Fonts. To define the page width and margins on our custom template, go to Format, Page. Then click on the Page tab.

5.4.05

Why We Should Increase the Margins to 1.25 inches

If you are writing a book or an ebook, it is important to set the correct page width at the beginning because this also determines the maximum image size. The default page has very small margins of 0.79 inches.

Subtracting twice 0.79 inches from the page width of 8.5 inches leaves a text area of about 6.9 inches. Most simple documents have a margins of one inch and a text area of 6.5 inches. But because our primary end goal is to create a source documents for an 8-inch wide by 10 inch high book, and because this book will require one inch margins for a 6 inch wide text area, we will set the width margins for 1.25 inches. In other words, 8.5 inches minus two times 1.25 inches equals 6 inches. Adjusting this setting at the beginning of our book writing process will ensure that any images we place in our documents will be a maximum of 6 inches wide. We will also set the top and bottom margins for one inch leaving a text area height of 9 inches. We will explain the reasoning for all of this in greater detail in our second book, Create and Print Your Own Book. For now, here is our Page tab screen. This is our default page style.

5.4.06

Create a Page Style Called Default Page Style with Footer

We will also create a Writer page style with a footer which we will then use to create a template called Default with Footer. To create a new page style, open a Writer document then open the Styles and Formatting panel. The click on the Page Styles icon. Then right click on the Default Page style. Then click New.

5.4.07r

In the Organizer tab, name the page style Default Style with FooterThen click on the Footer tab.

5.4.08r

Check the box to turn on the footer. The default spacing is .20 inches. We will reduce it to .08 inches. The default height is .20 inches. We will reduce it to .12 inches. Then click More.

5.4.09r

Check the left diagram so a single line is above the box. Change the color to dark blue. Then click OK. And click OK again. Then click File, Templates, Save As Template. Call it My Default Template with Footer. Repeat this process -adding a new Page Style called Default Style with Header and Footer - adding a header and a footer to a Writer document - to create a template called My Default Template with Header and Footer.

5.4.10

Click on File, Templates, Manage Templates and select the My Templates category. We now have three templates. To edit our Default Template, right click on it. Then click Edit.

5.4.11

Once we have made any changes we want to our default template, we can copy those changes to our other two templates by right clicking on them and clicking Edit. Then accept the Update Template Notice. Then click Save and Close.

Set the Image Style
Right click on our Default Template and click Edit to open it. The default image style when new images are added to a Libre Writer document is to align them to the right with an “Optimum” wrap. As we will explain in greater detail later, this does not work out well with Ebooks and websites. Because images and text are loaded separately in Ebooks and websites, we want images and text to clearly alternate. In other words, we want, text, then image, then text then another image. To achieve this goal, we want our images centered with no wrap and with a .10 inch margin all around. We can just click on each image and change them one at a time to align Centered – No Wrap. But this takes a lot of time and effort.

We can ensure that all of our inserted images in every document have the correct settings by changing the template setting for our images. Click on Format, Styles and Formatting. Then click on the third box, called Frame Styles.

5.4.12

Then right click Graphics. Then click Modify. Click on Type and change the Position Horizontal Alignment from Left to Center. Then click the Wrap tab. Set for None. Also increase the spacing to .10 inches.

5.4.13

Then click OK. Then close the Styles and Formatting window.

Change the Default Paragraph Style

The next thing we want to change is our Default Paragraph Style. Click on the Paragraph Style Icon which is the upper right icon in the styles window.

5.4.14

Then right click on Default Style to modify it. As we explain in greater detail in our second book, we do not want to use the default paragraph style as it will not work well with styling Ebooks and web pages. Instead, we want to use the Text Body Paragraph Style. To ensure that the style for all paragraphs is Text Body, click on the Organizer tab for Default Style and change the “Next Style” to Text Body.

5.4.15r

Also, for our Text Body Paragraph styles to be converted to Ebook and web page CSS styles, some of our Default Paragraph Styles need to be converted to something different from our Text Body Paragraph styles. Click on the Font tab and change the font family to Free Sans and the Font Size to 11.

5.4.16

Then click Save and Close.

Change the Text Body Paragraph Style

Because the Text Body Paragraph Style is based on the Default Paragraph style, changing the font family and font size for the Default Paragraph style also changes the font family and the font size for the Text Body Paragraph style. Right click on the Text Body paragraph style to edit it. Then click on the Font tab and change its font family to Liberation Sans and change its font size to 12.

Then click on the Indents and Spacing tab. Default is 0 indent, 0 spacing and Single Line spacing.

5.4.17r

The problem with these settings is that we will be using Liberation Sans font to write our book. Liberation Sans is a rather tall font meaning that single spacing causes the lines to be very close together making it harder to read. We will discuss this matter in greater detail in our second book. Here is an image of what our Liberation Sans text would look like with single spacing:

5.4.18

We only need a little more vertical space. We will therefore change the spacing to 1.15 lines which is an industry standard that works out well for print books, ebooks and websites. (This book and all of our other books and websites are written using 1.15 line spacing and Liberation Sans 12 Font).

We also want to create about one line of space above and below each paragraph. Rather than pressing Enter to create space between lines, we will add 0.06 inches of spacing above and below each paragraph. Here is what our Indents and Spacing screen now looks like:

5.4.19r

Click Apply and OK. Then change the text paragraph style at the beginning of our template from Default to Text Body.

Summary of all Paragraph Style Changes

Now that you now how to change paragraph styles and make new ones, we will present a Table of all the changes we will make to our Default Template. Nearly all of these custom paragraph styles are made by right clicking on the Text Body Paragraph Style, then click New. Each custom style made this way will eventually lead to a the creation of a matching CSS class. For example, the Text Body style will convert to p.western (because it uses a western font family) and the Text Body Bold Center Paragraph Style will become the CSS class p.text-body-bold-center-western.

5.4.20r

Table of Paragraph Style Converted to CSS Classes

CSS classes allow us to quickly and precisely control the appearance of text in our Ebook and Web pages in the same way that Paragraph Styles allow us to control the appearance of our text in ODT and PDF documents. Unfortunately, not all Writer paragraph styles are converted to CSS classes when we convert an ODT document to an HTML document. We therefore want to pay careful attention to the paragraph styles we use and do our best to use paragraph styles that will convert to CSS classes.

The best way to convert paragraph styles to CSS classes for our books is to base all custom paragraph styles on the Text Body paragraph styler rather than basing custom paragraph styles on the Default paragraph style. All heading paragraph styles are followed by the Text Body paragraph style and all custom paragraph styles should also be followed by the Text Body paragraph style.

Below we provide a table of several Paragraph Styles we are likely to use in our book. In our second book, we provide explanations for why these custom styles are needed. We also provide a free template you can download that has all of these styles already created.

Table of Paragraph Styles Conversion to CSS Classes

Paragraph Style

Inherits from

Changes & Resulting CSS class after Save As HTML Writer conversion

Default

Single spacing
done

None

Change font for Free Sans 11. Change next style to Text Body. Results in class western but with inline CSS.

Caption

Done

Default
change to
Text Body

Next Style is Caption but change to Text Body. Also change Inherit from Default to Text Body which changes font to Liberation Sans (results in a class p.caption-western)

Custom inherit from Default skip

Default

No class is created other than Western plus inline CSS bad avoid.

Custom inherit from Text Body skip

Text Body

Class is p.text-body-custom-western
This is what we want.

Figure

done

Caption

This is sometimes created in CSS when we create a caption. Style like caption except font style normal. Results in class p.figure-western.

Footer
spacing .02 above and below. Line Spacing Single done

Default
change to
Text Body

Change Font Size to 11 Italic. Color to Dark Blue Also change Inherit from Default to Text Body. Also change Alignment from Left to Center. (results in a class p.footer-western)

Header
spacing .02 above and below. Line Spacing Single done

Default
change to
Text Body

Change Font Family to Lucida Bold Italic Size to 12. Color to Dark Blue Also change Inherit from Default to Text Body. Also change Alignment from Left to Center. (results in a class p.header-western)

Heading

done

Default
change to
Text Body

Change Inherit from Default to Inherit from Text Body, Change Font from Free Sans to Liberation Sans

Heading 1
done

Heading

Converts to elements h1 plus class h1. western add Regular 20 blue. Alignment Center. Spacing 2 inches above the paragraph.

Heading 2
done

Heading

Converts to elements h2, plus class h2.western add Regular 18 blue. Alignment Center. Spacing .40 inch above the paragraph.

Heading 3
done

Heading

Converts to elements h3, plus class h3.western add bold 16 blue. Spacing .20 inch above the paragraph.

Heading 4
done

Heading

Converts to elements h4, plus class h4.western add bold 14 blue. Spacing .26 inch above the paragraph.

Quotations
Indent .4 before and after, spacing .10 above and below.
done

Default
change to
Text Body

Converts to an element called blockquote and a class called blockquote-western. Change Inherit from to Text Body, Change font to Liberation Sans and change Next Style to Text Body. 14 Italic Center

Table Contents
(AKA Table Data)
Next style also Table Contents done

Default
change to
Text Body

Converts to td element. Change Inherit from Default to Inherit from Text Body. Change font size to 12, line spacing to 0 Single. Class td p.western

Table Heading
Next style also Table Heading done

Table Contents

Converts to th element. Change font size to 12 bold, line spacing to 0 Single. Class th p.western

Table Feature Box
create from Table Contents
done

Table Contents

Same as Table Contents. But change font size 12. Single with .06 spacing. Results in class td p.table-contents-feature-box-western

Table Feature Box Title

done

Table Contents

Same as Table Heading. But change font size 12 bold. Single with .06 spacing. Alignment Center. Class is p.table-contents-feature-box-title-western

Text Body

Liberation Sans 12

.06 above and below paragraph and 1.15 spacing done

Default

Text body sets both the p element and the western class. Font family and size must be different from Default font. This should be the primary text in our book, html file, ebook and website. Class is p.western

Text Body Indent

done

Text Body

Next style is Text Body Indent but change next style to Text Body. Class is p.text-body-indent-western

Text Body Center

done

Text Body

Same as Text Body except center alignment. Custom class p.text-body-center-western

Text Body Center Large

done

Text Body

Same as Text Body except center alignment Font size 16. Custom class p.text-body-center-large-western

Text Body Bold
done

Text Body

Same as Text Body except bold. Custom class p.text-body-bold-western

Text Body Bold Big
done

Text Body

Same as Text Body except bold 14. Class p.text-body-bold-big-western

Text Body Bold Center done

Text Body

Same as Text Body except bold 12 Center. Class p.text-body-bold-center-western

Topic Title

done

Text Body

Custom Style 14 bold with no space below and .16 above Custom class p.topic-title-western

Subtitle
done

Heading

Spacing 1 inch below the paragraph. , 16 regular blue. Alignment Center. Class p.subtitle-western

Contents Heading
(TOC Title)

Heading

Spacing .06 above and below. Center 20pt Regular Blue. Creates class p.contents-heading-western

Index

Default

Change Inherit from Default to Inherit from Text Body

Contents 1 (chapters)

Index

Spacing .12 above .04 below. 14 Regular Blue creates class p.contents1-western

Contents 2 (sections)

Index

Before text .20 inches, Above .06, below .04 Single 12 Regular. creates class p.contents2-western

Contents 3 (subjects)

Index

Before text .40 inches, Above .06, below .04 Single 12 Regular. creates class p.contents3-western

FRAME STYLE

Inherit

CHANGES

Graphics

----

Frame Style Wrap None Spacing 10
and Type, Position, Horizontal Center to Paragraph Area.

Graphics No Spacing

Graphics

Same as Graphics but No Spacing

Graphics with Border

Graphics

Wrap None with 10 spacing, .05 pt solid border all around. .02 spacing to contents

Graphics with Shadow

Graphics

Wrap None with 10 spacing, 2.05 pt solid border all around. .02 spacing to contents
Color Blue Shadow lower right.

PAGE STYLE

Inherit

CHANGES

Default Style

Default

Width x Height is 8.5 by 11 and margins are 1.25 inches on sides and 1 inch top and bottom

Default Style with Footer

Default

Footer On, Spacing .08, Height .12. Single border line above. Line Color Dark Blue

Default Style with Footer and Header

Default

Header On, Spacing .08, Height .12. Single border line below. Line Color Dark Blue Header Background Color Light Blue.

Front Matter

Default

Change page numbers to lower case Roman numerals. No header. Just footer.

First Page

Default

No header or footer. Use for first 2 pages (if no cover image) to 4 pages (if cover image).

Key Point

b5.4.01

We are not actually expecting you to create a custom Writer template with all of these changes. We simply wanted to provide you with a complete list so you can see how it is done. To download this custom template, just visit the website for our second book: Create and Publish Your Own Book (dot) org.

Hide the Right Side Panel

By default, Libre Writer displays a panel on the right side of the document. The only important icon in this group is the Styles and Formatting icon. We have added this icon to the Formatting tool bar. We therefore can hide this side panel by clicking on black box at the top of the panel, then clicking on Close Sidebar.

5.4.21

We can also close the side bar from the main menu by clicking on View, Sidebar and unchecking it. We will make more refinements to our custom default template in the future. But this will at least get the page spacing and content to about what we will need. So click Save and then close our template. Then open a new Writer document and click on File Properties and you will see that our document has been assigned to our new Default template.

5.4.22

Want to Learn More?

This completes our customization of Libre Writer. We have now made dozens of modifications to both Libre Writer and Linux Mint. As we explained earlier, we can now make a DistroTweak copy of all of this so that we do not have to repeat this process in the future – and so we can install this identical system with all of our modifications intact on other computers with just the click of a few buttons.

If you are interested in creating your own Print Book or Ebook, you should consider reading our complete book on this topic called Create and Publish Your Own Book... With Libre Writer & IngramSpark, where we go into more detail on creating a styles, headers, footers and Table of Contents for your print book and ebook.

5.4.23

What’s Next?

In the next chapter, we will review how to use Libre Office Draw to create a custom diagram and how to use Libre Office Calc to create a custom chart. Then we review how to use Libre Office Impress to create a custom presentation.