
In this section we will review how to create your own custom template – which can then be used as a model for creating all of your future documents and all of your future templates. A template is a special document which is used as a pattern for creating other documents. The template we will create is specifically designed to be a source document for creating not only print books and PDF books but also for creating Ebooks, web pages and online course pages. This is because the custom Paragraph Styles we will create will be automatically converted by Libre Writer to Custom CSS Classes during File Save As HTML Writer conversion.
A Look at the Default Template
Libre Office Writer comes with a predefined template which cannot be easily changed. It can be found by going to Tools, Options, LibreOffice Writer, Basic Fonts. In a previous section, we changed the settings in this screen from Liberation Sans Serif to Liberation Sans.
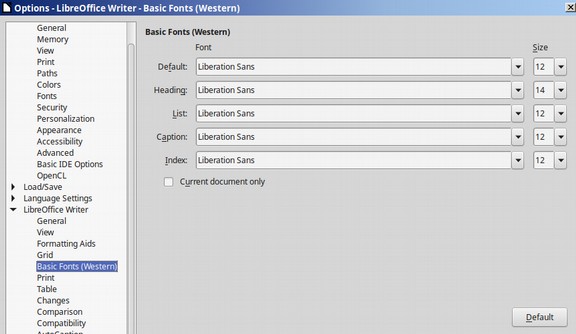
The problem with this screen is that it is not a real template. A real template would allow us to set the page margins, footers, headers, image properties and make dozens of other formatting decisions. In order to control all of these settings, we need to create our own custom template.
Create your own custom template
To create a new blank template, click on File, New, Text Document to open a new blank page. We can turn any document into a template by clicking on File, Templates, Save as Template.
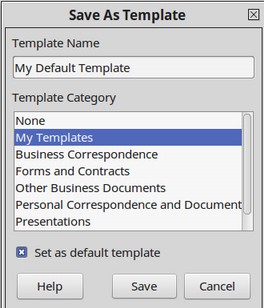
Give it a name such as My Default Template and check the box to make it our default template. Then assign it to the My Templates category and click Save. To review and edit our new default template, go to File, Templates, Manage Templates.
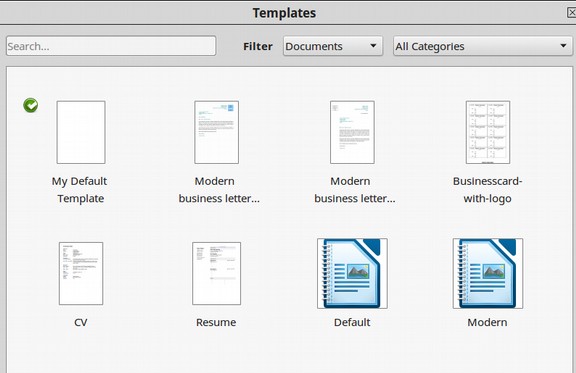
Right click on My Default Template. Then click Edit.
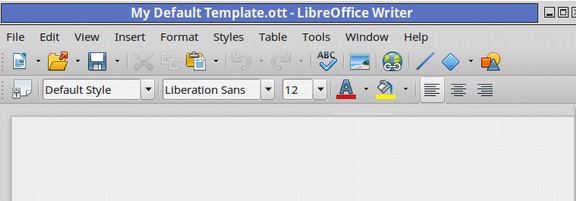
This will open the template – which will look like a new blank Writer document – with one major exception. At the top of the screen, you will see that the file name ends with an OTT extension rather than an ODT extension. This OTT ending extension tells us that this is a template and not a normal Writer document.
So far, our template is the same as the default template in Tools, Options, Libre Writer Fonts. To define the page width and margins on our custom template, go to Format, Page. Then click on the Page tab.
Why We Should Increase the Margins to 1.25 inches
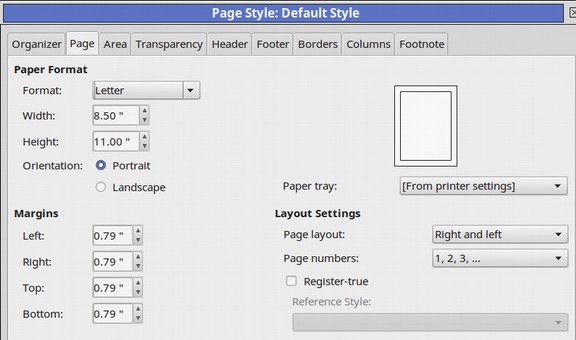
If you are writing a book or an ebook, it is important to set the correct page width at the beginning because this also determines the maximum image size. The default page has very small margins of 0.79 inches.
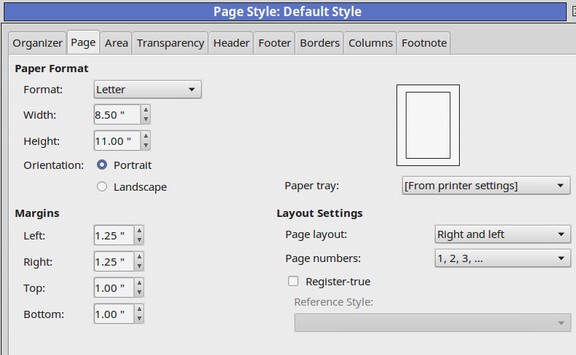
Subtracting twice 0.79 inches from the page width of 8.5 inches leaves a text area of about 6.9 inches. Most simple documents have a margins of one inch and a text area of 6.5 inches. But because our primary end goal is to create a source documents for an 8-inch wide by 10 inch high book, and because this book will require one inch margins for a 6 inch wide text area, we will set the width margins for 1.25 inches. In other words, 8.5 inches minus two times 1.25 inches equals 6 inches. Adjusting this setting at the beginning of our book writing process will ensure that any images we place in our documents will be a maximum of 6 inches wide. We will also set the top and bottom margins for one inch leaving a text area height of 9 inches. We will explain the reasoning for all of this in greater detail in our second book, Create and Print Your Own Book. For now, here is our Page tab screen. This is our default page style.
Create a Page Style Called Default Page Style with Footer
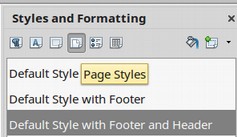
We will also create a Writer page style with a footer which we will then use to create a template called Default with Footer. To create a new page style, open a Writer document then open the Styles and Formatting panel. The click on the Page Styles icon. Then right click on the Default Page style. Then click New.
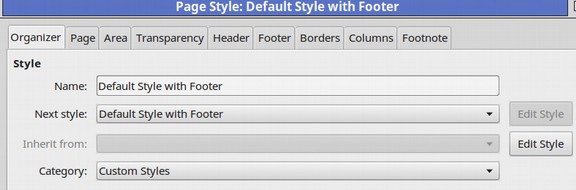
In the Organizer tab, name the page style Default Style with Footer. Then click on the Footer tab.
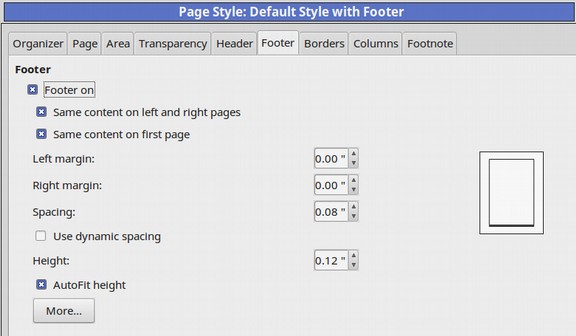
Check the box to turn on the footer. The default spacing is .20 inches. We will reduce it to .08 inches. The default height is .20 inches. We will reduce it to .12 inches. Then click More.
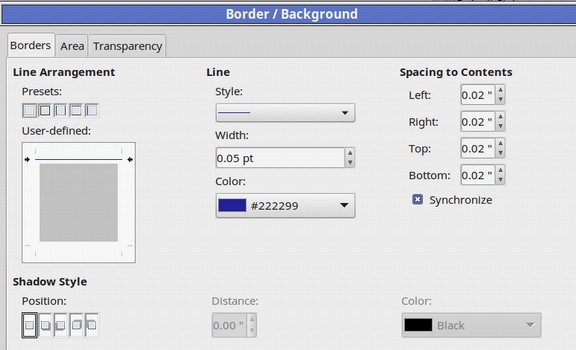
Check the left diagram so a single line is above the box. Change the color to dark blue. Then click OK. And click OK again. Then click File, Templates, Save As Template. Call it My Default Template with Footer. Repeat this process -adding a new Page Style called Default Style with Header and Footer - adding a header and a footer to a Writer document - to create a template called My Default Template with Header and Footer.
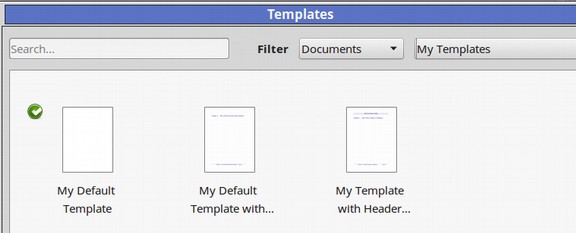
Click on File, Templates, Manage Templates and select the My Templates category. We now have three templates. To edit our Default Template, right click on it. Then click Edit.
Once we have made any changes we want to our default template, we can copy those changes to our other two templates by right clicking on them and clicking Edit. Then accept the Update Template Notice. Then click Save and Close.
Set the Image Style
Right click on our Default Template and click Edit to open it. The default image style when new images are added to a Libre Writer document is to align them to the right with an “Optimum” wrap. As we will explain in greater detail later, this does not work out well with Ebooks and websites. Because images and text are loaded separately in Ebooks and websites, we want images and text to clearly alternate. In other words, we want, text, then image, then text then another image. To achieve this goal, we want our images centered with no wrap and with a .10 inch margin all around. We can just click on each image and change them one at a time to align Centered – No Wrap. But this takes a lot of time and effort.
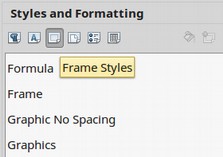
We can ensure that all of our inserted images in every document have the correct settings by changing the template setting for our images. Click on Format, Styles and Formatting. Then click on the third box, called Frame Styles.
Then right click Graphics. Then click Modify. Click on Type and change the Position Horizontal Alignment from Left to Center. Then click the Wrap tab. Set for None. Also increase the spacing to .10 inches.
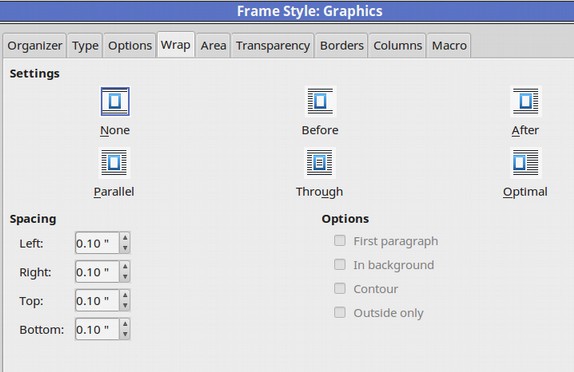
Then click OK. Then close the Styles and Formatting window.
Change the Default Paragraph Style
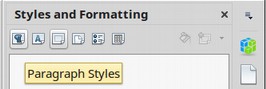
The next thing we want to change is our Default Paragraph Style. Click on the Paragraph Style Icon which is the upper right icon in the styles window.
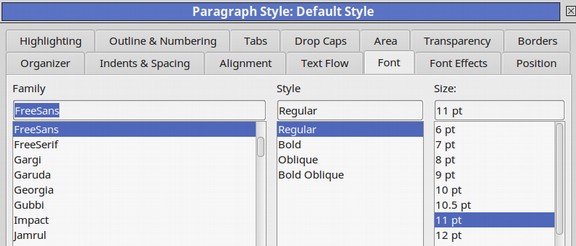
Then right click on Default Style to modify it. As we explain in greater detail in our second book, we do not want to use the default paragraph style as it will not work well with styling Ebooks and web pages. Instead, we want to use the Text Body Paragraph Style. To ensure that the style for all paragraphs is Text Body, click on the Organizer tab for Default Style and change the “Next Style” to Text Body.

Also, for our Text Body Paragraph styles to be converted to Ebook and web page CSS styles, some of our Default Paragraph Styles need to be converted to something different from our Text Body Paragraph styles. Click on the Font tab and change the font family to Free Sans and the Font Size to 11.
Then click Save and Close.
Change the Text Body Paragraph Style
Because the Text Body Paragraph Style is based on the Default Paragraph style, changing the font family and font size for the Default Paragraph style also changes the font family and the font size for the Text Body Paragraph style. Right click on the Text Body paragraph style to edit it. Then click on the Font tab and change its font family to Liberation Sans and change its font size to 12.
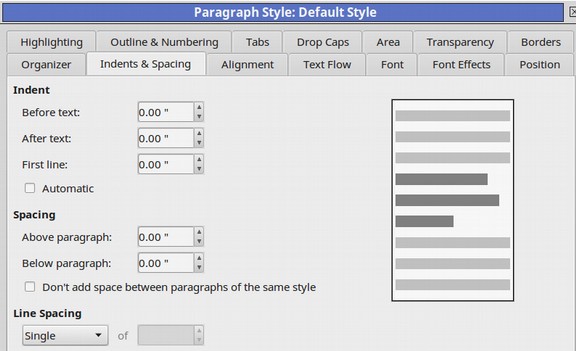
Then click on the Indents and Spacing tab. Default is 0 indent, 0 spacing and Single Line spacing.
The problem with these settings is that we will be using Liberation Sans font to write our book. Liberation Sans is a rather tall font meaning that single spacing causes the lines to be very close together making it harder to read. We will discuss this matter in greater detail in our second book. Here is an image of what our Liberation Sans text would look like with single spacing:

We only need a little more vertical space. We will therefore change the spacing to 1.15 lines which is an industry standard that works out well for print books, ebooks and websites. (This book and all of our other books and websites are written using 1.15 line spacing and Liberation Sans 12 Font).
We also want to create about one line of space above and below each paragraph. Rather than pressing Enter to create space between lines, we will add 0.06 inches of spacing above and below each paragraph. Here is what our Indents and Spacing screen now looks like:

Click Apply and OK. Then change the text paragraph style at the beginning of our template from Default to Text Body.
Summary of all Paragraph Style Changes
Now that you now how to change paragraph styles and make new ones, we will present a Table of all the changes we will make to our Default Template. Nearly all of these custom paragraph styles are made by right clicking on the Text Body Paragraph Style, then click New. Each custom style made this way will eventually lead to a the creation of a matching CSS class. For example, the Text Body style will convert to p.western (because it uses a western font family) and the Text Body Bold Center Paragraph Style will become the CSS class p.text-body-bold-center-western.
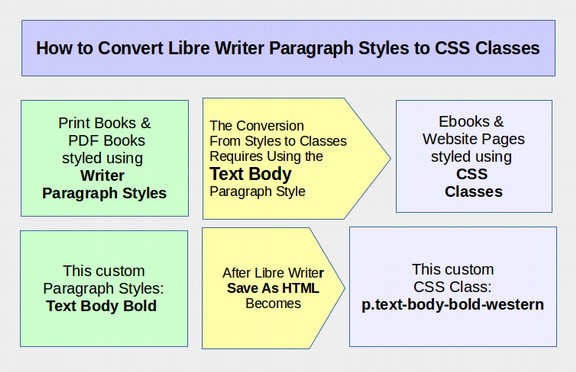
Table of Paragraph Style Converted to CSS Classes
CSS classes allow us to quickly and precisely control the appearance of text in our Ebook and Web pages in the same way that Paragraph Styles allow us to control the appearance of our text in ODT and PDF documents. Unfortunately, not all Writer paragraph styles are converted to CSS classes when we convert an ODT document to an HTML document. We therefore want to pay careful attention to the paragraph styles we use and do our best to use paragraph styles that will convert to CSS classes.
The best way to convert paragraph styles to CSS classes for our books is to base all custom paragraph styles on the Text Body paragraph styler rather than basing custom paragraph styles on the Default paragraph style. All heading paragraph styles are followed by the Text Body paragraph style and all custom paragraph styles should also be followed by the Text Body paragraph style.
Below we provide a table of several Paragraph Styles we are likely to use in our book. In our second book, we provide explanations for why these custom styles are needed. We also provide a free template you can download that has all of these styles already created.
Table of Paragraph Styles Conversion to CSS Classes
|
Paragraph Style |
Inherits from |
Changes & Resulting CSS class after Save As HTML Writer conversion |
|---|---|---|
|
Default Single spacing |
None |
Change font for Free Sans 11. Change next style to Text Body. Results in class western but with inline CSS. |
|
Caption Done |
Default |
Next Style is Caption but change to Text Body. Also change Inherit from Default to Text Body which changes font to Liberation Sans (results in a class p.caption-western) |
|
Custom inherit from Default skip |
Default |
No class is created other than Western plus inline CSS bad avoid. |
|
Custom inherit from Text Body skip |
Text Body |
Class is p.text-body-custom-western |
|
Figure done |
Caption |
This is sometimes created in CSS when we create a caption. Style like caption except font style normal. Results in class p.figure-western. |
|
Footer |
Default |
Change Font Size to 11 Italic. Color to Dark Blue Also change Inherit from Default to Text Body. Also change Alignment from Left to Center. (results in a class p.footer-western) |
|
Header |
Default |
Change Font Family to Lucida Bold Italic Size to 12. Color to Dark Blue Also change Inherit from Default to Text Body. Also change Alignment from Left to Center. (results in a class p.header-western) |
|
Heading done |
Default |
Change Inherit from Default to Inherit from Text Body, Change Font from Free Sans to Liberation Sans |
|
Heading 1 |
Heading |
Converts to elements h1 plus class h1. western add Regular 20 blue. Alignment Center. Spacing 2 inches above the paragraph. |
|
Heading 2 |
Heading |
Converts to elements h2, plus class h2.western add Regular 18 blue. Alignment Center. Spacing .40 inch above the paragraph. |
|
Heading 3 |
Heading |
Converts to elements h3, plus class h3.western add bold 16 blue. Spacing .20 inch above the paragraph. |
|
Heading 4 |
Heading |
Converts to elements h4, plus class h4.western add bold 14 blue. Spacing .26 inch above the paragraph. |
|
Quotations |
Default |
Converts to an element called blockquote and a class called blockquote-western. Change Inherit from to Text Body, Change font to Liberation Sans and change Next Style to Text Body. 14 Italic Center |
|
Table Contents |
Default |
Converts to td element. Change Inherit from Default to Inherit from Text Body. Change font size to 12, line spacing to 0 Single. Class td p.western |
|
Table Heading |
Table Contents |
Converts to th element. Change font size to 12 bold, line spacing to 0 Single. Class th p.western |
|
Table Feature Box |
Table Contents |
Same as Table Contents. But change font size 12. Single with .06 spacing. Results in class td p.table-contents-feature-box-western |
|
Table Feature Box Title done |
Table Contents |
Same as Table Heading. But change font size 12 bold. Single with .06 spacing. Alignment Center. Class is p.table-contents-feature-box-title-western |
|
Text Body Liberation Sans 12 .06 above and below paragraph and 1.15 spacing done |
Default |
Text body sets both the p element and the western class. Font family and size must be different from Default font. This should be the primary text in our book, html file, ebook and website. Class is p.western |
|
Text Body Indent done |
Text Body |
Next style is Text Body Indent but change next style to Text Body. Class is p.text-body-indent-western |
|
Text Body Center done |
Text Body |
Same as Text Body except center alignment. Custom class p.text-body-center-western |
|
Text Body Center Large done |
Text Body |
Same as Text Body except center alignment Font size 16. Custom class p.text-body-center-large-western |
|
Text Body Bold |
Text Body |
Same as Text Body except bold. Custom class p.text-body-bold-western |
|
Text Body Bold Big |
Text Body |
Same as Text Body except bold 14. Class p.text-body-bold-big-western |
|
Text Body Bold Center done |
Text Body |
Same as Text Body except bold 12 Center. Class p.text-body-bold-center-western |
|
Topic Title done |
Text Body |
Custom Style 14 bold with no space below and .16 above Custom class p.topic-title-western |
|
Subtitle |
Heading |
Spacing 1 inch below the paragraph. , 16 regular blue. Alignment Center. Class p.subtitle-western |
|
Contents Heading |
Heading |
Spacing .06 above and below. Center 20pt Regular Blue. Creates class p.contents-heading-western |
|
Index |
Default |
Change Inherit from Default to Inherit from Text Body |
|
Contents 1 (chapters) |
Index |
Spacing .12 above .04 below. 14 Regular Blue creates class p.contents1-western |
|
Contents 2 (sections) |
Index |
Before text .20 inches, Above .06, below .04 Single 12 Regular. creates class p.contents2-western |
|
Contents 3 (subjects) |
Index |
Before text .40 inches, Above .06, below .04 Single 12 Regular. creates class p.contents3-western |
|
FRAME STYLE |
Inherit |
CHANGES |
|
Graphics |
---- |
Frame Style Wrap None Spacing 10 |
|
Graphics No Spacing |
Graphics |
Same as Graphics but No Spacing |
|
Graphics with Border |
Graphics |
Wrap None with 10 spacing, .05 pt solid border all around. .02 spacing to contents |
|
Graphics with Shadow |
Graphics |
Wrap None with 10 spacing, 2.05 pt solid border all around. .02 spacing to contents |
|
PAGE STYLE |
Inherit |
CHANGES |
|
Default Style |
Default |
Width x Height is 8.5 by 11 and margins are 1.25 inches on sides and 1 inch top and bottom |
|
Default Style with Footer |
Default |
Footer On, Spacing .08, Height .12. Single border line above. Line Color Dark Blue |
|
Default Style with Footer and Header |
Default |
Header On, Spacing .08, Height .12. Single border line below. Line Color Dark Blue Header Background Color Light Blue. |
|
Front Matter |
Default |
Change page numbers to lower case Roman numerals. No header. Just footer. |
|
First Page |
Default |
No header or footer. Use for first 2 pages (if no cover image) to 4 pages (if cover image). |
|
Key Point
|
We are not actually expecting you to create a custom Writer template with all of these changes. We simply wanted to provide you with a complete list so you can see how it is done. To download this custom template, just visit the website for our second book: Create and Publish Your Own Book (dot) org. |

Hide the Right Side Panel
By default, Libre Writer displays a panel on the right side of the document. The only important icon in this group is the Styles and Formatting icon. We have added this icon to the Formatting tool bar. We therefore can hide this side panel by clicking on black box at the top of the panel, then clicking on Close Sidebar.
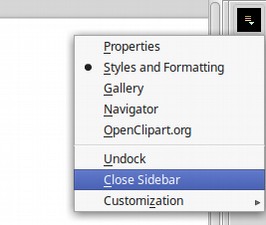
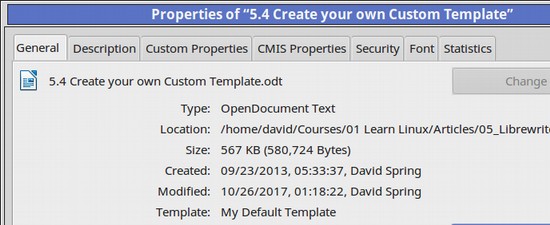
We can also close the side bar from the main menu by clicking on View, Sidebar and unchecking it. We will make more refinements to our custom default template in the future. But this will at least get the page spacing and content to about what we will need. So click Save and then close our template. Then open a new Writer document and click on File Properties and you will see that our document has been assigned to our new Default template.
Want to Learn More?
This completes our customization of Libre Writer. We have now made dozens of modifications to both Libre Writer and Linux Mint. As we explained earlier, we can now make a DistroTweak copy of all of this so that we do not have to repeat this process in the future – and so we can install this identical system with all of our modifications intact on other computers with just the click of a few buttons.
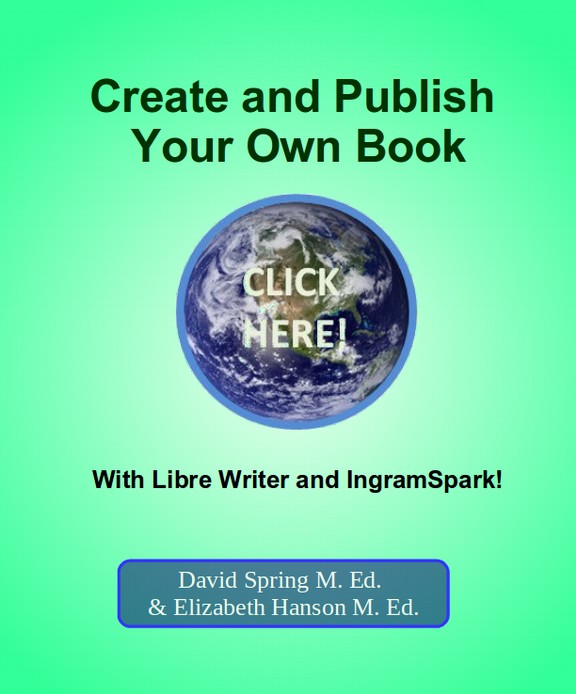
If you are interested in creating your own Print Book or Ebook, you should consider reading our complete book on this topic called Create and Publish Your Own Book... With Libre Writer & IngramSpark, where we go into more detail on creating a styles, headers, footers and Table of Contents for your print book and ebook.
What’s Next?
In the next chapter, we will review how to use Libre Office Draw to create a custom diagram and how to use Libre Office Calc to create a custom chart. Then we review how to use Libre Office Impress to create a custom presentation.