While Libre Writer works better than MS Word even with no changes, there are many steps you can take to improve the appearance and performance of Libre Writer. In this article, we will show you how to get the most out of Libre Writer. Just as we made several changes to improve the appearance and performance of Linux Mint, we will review simple steps you can take to make Libre Writer even easier to use.

In
this section, we will make the following changes to Libre Writer:
#1 Simplify the Writer Main Menu
#2 Simplify the Standard Toolbar
#3 Simplify the Formatting Toolbar
#4 Turn off Word Completion
#5 Customize Tools Options
#6 Greatly Increase the Graphics Cache
#7 Change the Path to the Default Pictures folder
#8 Change the Path to the Default Templates folder
#9 Change the Default Fonts
#10 Increase the Number of Recent Documents
#11 Reduce Time for Save AutoRecovery
#12 Stop Hidden Files from Showing in LibreWriter
Let’s review the why, where and how of each of these changes:
#1 Simplify the Writer Main Menu
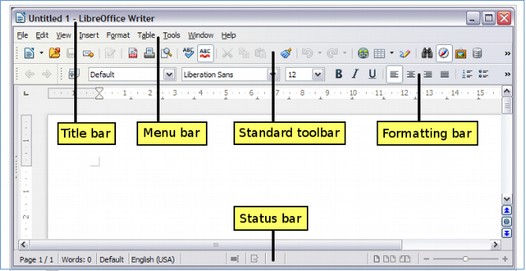
Below is the default menu of LibreWriter. When you first open LibreWriter, it has a very complex and cluttered menu and workspace. There are so many tools and icons that many of them are off to the right on the screen. There are even more tools in the right sidebar.

Since we will be using LibreWriter extensively for writing, organizing and formatting our sections, chapters and books, it is worth taking a few minutes to simplify this menu – leaving only the most used icons. First, let’s look closer at the various parts of the LibreWriter workspace:
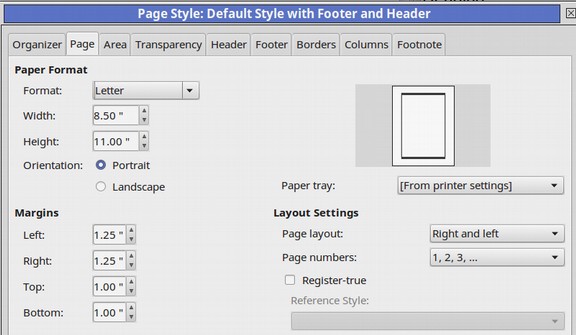
Title Bar, Main Menu, Standard Toolbar and Formatting Toolbar
The top row is the title bar. The second row with words is the menu bar. The third row is the standard tool bar and the fourth row is the formatting tool bar.
Simplify the Main Menu
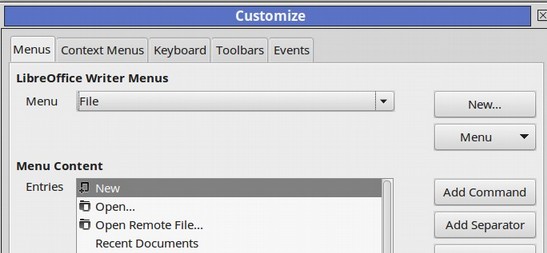
The first step in simplifying LibreWriter is to edit the main menu. The second row is the Main Menu. It has nine menu items which work in almost the same way as Word 2003. We can eliminate any of the items in the drop down menus if we feel we do not need them. For example, the File Menu item has a huge submenu.
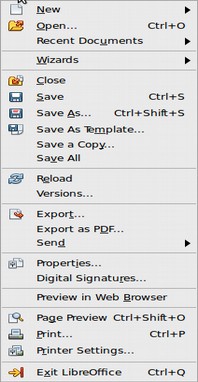
Do we really want to look at all of these choices if there are some we will never use? To get rid of Digital Signatures, click on Tools, Customize, Menus.
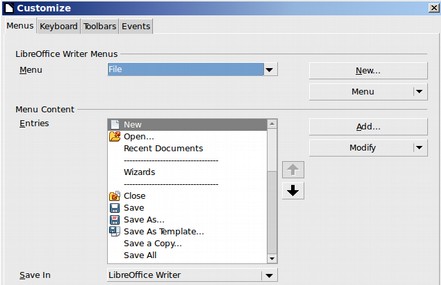
Make sure it is set for the File Menu. Then scroll down to Digital Signatures and click Modify, Delete. Then click on the File menu to confirm the change. Make similar reductions in the Edit Menu. Next open the View Menu. The first thing we will do is turn off the ruler by going to View, Ruler and unchecking the box to the left of the word Ruler. This will give us more space in the Workspace and make our display screen and screen shots less confusing.
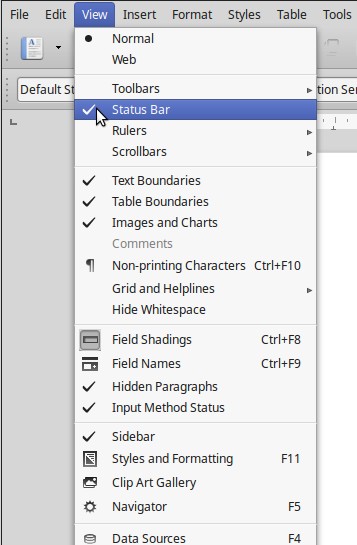
We will uncheck the Status Bar, Hidden Paragraphs, input Method Status and Sidebar. We will also uncheck the ruler. These changes can be made and carried forward to new documents without opening the default template.
Why We Should Simplify the Writer Tool Bars
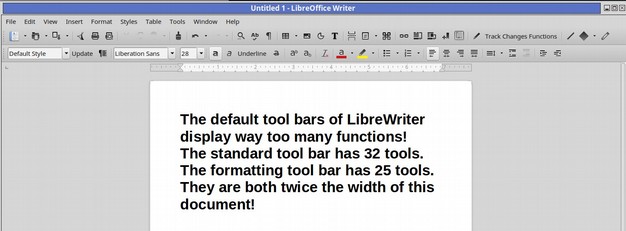
The
default toolbars have so many functions that they are twice as wide
as a typical Writer document!
There
are at least three reasons to simplify the toolbars by hiding many of
these functions. First, nearly all of these functions can be accessed
from the main menu. Second, we want to use carefully selected styles
rather than direct formatting in order to keep our code clean and our
text consistent for books, ebooks and websites. Hiding direct
formating functions will help remind us that we want to use styles
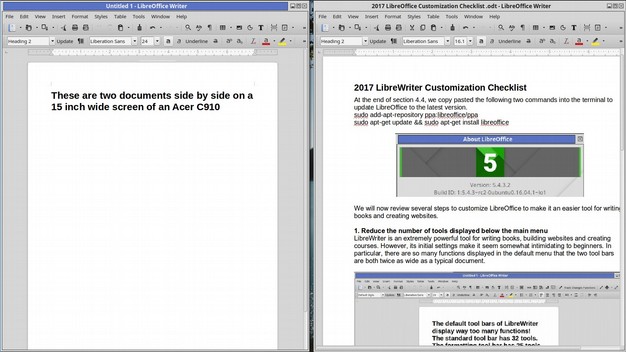
instead of direct functions. Third, we want to be able to view
all functions while displaying two documents (or one document and one
web browser) side by side:
Next, we will simplify the Standard Toolbar. We will then simplify the Formatting Toolbar.
#2 Simplify the Standard Toolbar
The benefit of customizing a toolbar is to add any icons you like to use and hide any icons you never use. To customize any toolbar, go to View, Toolbars, Customize. This brings up the same Customize Window we just used to simplify the Main Menu.
Click on Toolbars to bring up the Standard Toolbar Edit screen:
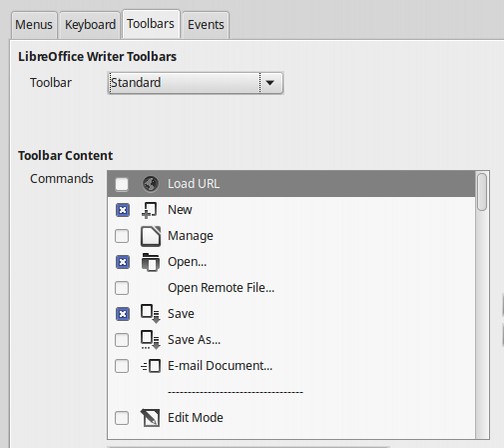
To add a command or icon, check on it. To remove an existing command, uncheck its box. Scroll down and uncheck the following: Export as PDF, Print, Print Preview, Clone Formatting, Find and Replace, Non Printed Character, Insert Table, Image, Chart, Insert Field, Special Character, Insert Footnote, Insert Endnote, Bookmark. Comment, Record Changes, Show Drawing Functions.
#3 Simplify the Formatting Toolbar
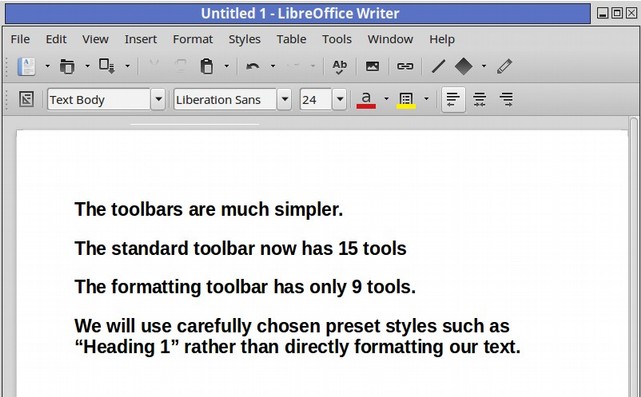
To customize the formatting toolbar, click View, Toolbars, Customize to go back to the Toolbars Tab. Then use the Drop down arrow to the right of the word Standard to select the Formatting Toolbar. We will uncheck: Update Style, New Style, Bold, Italic, Underline, Strikethrough, super script, sub script, Clear Direct Formatting, Bullets, Numbering. Justify, Line Spacing, Increase Spacing, Decrease Spacing. Increase Indent, Decrease Indent. Left to Right. Right to Left and Highlighting. Then we will add a command called Background Color. Then click OK. We now have a much simpler menu that will be easier to work with.
#4 Turn off Word Completion
A common complaint about LibreOffice Writer is its very annoying word completion function. This is a function which tries to complete long words for you. The problem is that, most of the time, it guesses wrong and makes it harder for you to type in the word you really want to use. To turn off Word Completion, go to Tools, AutoCorrect, AutoCorrect Options. Then click on the Word Completion tab.
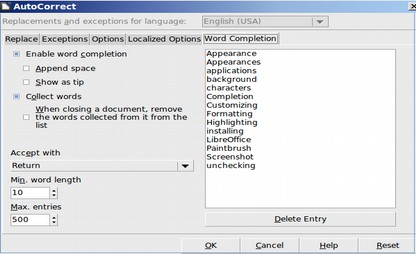
Uncheck Enable Word Completion. Then click OK.
#5 Customize Tools Options
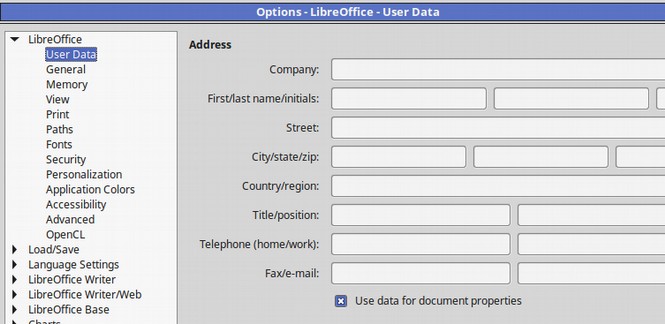
Our next task is to modify a few of the settings on the Tools, Options window. Click on Tools, Options. In User Data, type in your first and last name to automatically add this data to every document you create.
#6 Greatly Increase the Graphics Cache
Next, click on Tools, Options, LibreOffice, Memory. By default, the LibreOffice Graphics cache is set for a mere 20 MB. If you never put more than 10 images in a document and each image is under 2 MB, this might be OK. But when writing book files and website files, I often have more than 20 images per document and occasionally over 50 images per document. Even with all of these images being optimized or compressed to reduce the image file size, we will need more than 20 MB. We will also be adding many other objects besides images.
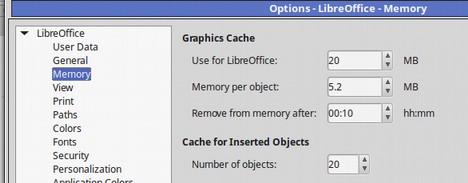
We will increase the Graphics cache to 200MB. Also increase Remove from memory to 30 minutes. Finally, we will raise the number of objects from 20 to 50.
#7 Change the Path to the Default Pictures folder
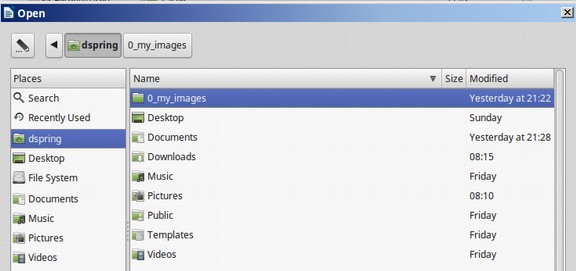
A problem with LibreWriter is when you click on Insert Picture, From File in either Libre Writer, Libre Draw or Libre Impress, you are taken to a very strange hidden images folder called gallery.
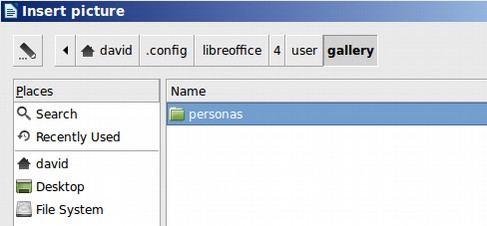
Our Nemo File Manager comes with a folder called Pictures. But we are using that folder to hold all of our screen shots taken with Shutter. Since we need an easily accessible folder for our LibreWriter images, we will use our Nemo file manager to create another folder called 0_my_images which is at the top level of our Home folder. We can then make this the default images folder for LibreOffice by going to Tools, Options, LibreOffice, Paths:
Click on Images to select that path. Then change the path to the Images folder to /home/david/00_my_images. First, select the images row. Then click Edit. Then navigate to the folder you want to use. Then click OK.
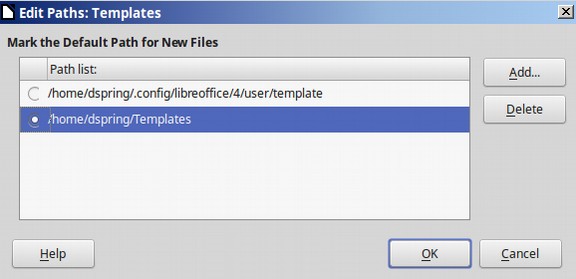
#8 Change the Path to the Default Templates folder
The templates folder has also been put in a very strange place. We will review how to create our own template in a later section. For now, we want to change the default template folder to the Templates folder in our Mint File Manager. Go to Tools, Options, Paths and select Templates. Then click on Edit. Then click Add. Then select the Mint Templates folder. Then click OK. Then click OK again.
#9 Change the Default Fonts
By default, LibreWriter uses whatever font is the default font for the operating system. To see this setting, click on Tools, Options, LibreWriter, Basic Fonts (Western).
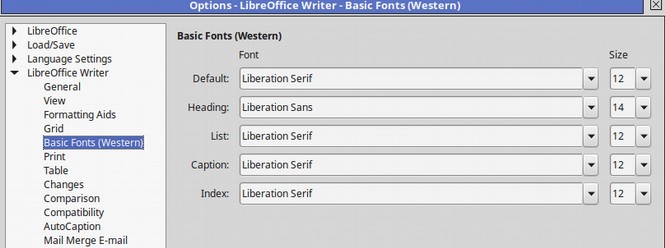
In Linux Mint, the default font is Liberation Sans Serif Size 12. We can override this setting by creating our own template, which we will do later. But for now, because Sans Serif is more legible on computer screens, we will change all the above options to Liberation Sans Serif. This will automatically change the font in the default paragraph style which we will look at more closely later.
#10 Increase the Number of Recent Documents
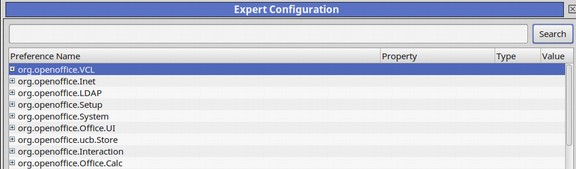
When you first open LibreWriter, it is common to look through a list of Recent Documents to find one you recently worked on and would like to use again. This list is found by going to File, Recent Documents. By default, the maximum number of Recent Documents stored in LibreWriter is 25. When you are working on writing a book or research report, you will almost certainly want a list of many more recent documents than this. In the past, we increased the number of recent documents by using a free extension called History Manager. Recently, LibreOffice has added a simple way for us to increase the number of recent documents in the Tools, Options screen. Just scroll down to the Advanced tab.
Then click Open Expert Configuration. This will bring up a list of functions we are able to change.
Scroll down the list to Common and click on it to open it. Then find the History line and click on it to open it.
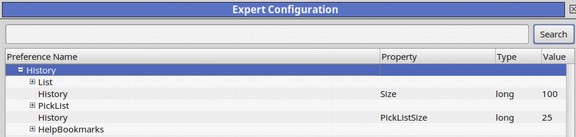
Under Pick List is a line called History that has a Property called PickListSize. Click on this line to edit this property. Increase the Value from 25 to 99. Then click OK. Then click OK again and again. Now every time you open and close a new document, the list of Recent Documents will increase all the way up to the last 99 documents.
#11 Reduce Time for Save AutoRecovery
In Tools, Options, click on Load/Save, General. In the Save section, you’ll see that by default, LibreOffice automatically saves your document every 15 minutes. Reduce this to 10 minutes to reduce the amount of changes your will lose if your computer freezes up and you are forced to restart your computer. We could even lower this to every five minutes. However, our work would have to stop for every save. So 10 minutes is a reasonable compromise.
#12 Stop Hidden Files from Showing in LibreWriter
When we click on File Open from a Libre Writer document, then click on the Home folder, a bunch of folders appear with a dot at the beginning of the folder name that should not appear.

To hide these folders, from an open document, click File Open. When the file manager comes up, right click in the workspace. Uncheck Show Hidden Files.
This only needs to be done once. After this, whenever you click file open from LibreOffice only the normal folders will show.
What's Next
This completes our simplification of LibreOffice Writer. In the next section, we will add some free extensions to expand the function of LibreOffice.